
When a PC begins to crash, freeze, or crawl immediately after startup, it is often due to a conflict between background services or startup applications. Windows provides a built-in troubleshooting tool called System Configuration, commonly known by its execution command, msconfig. Learning how to use msconfig windows 11 and 10 allows users to systematically disable these culprits to restore system stability. However, because this tool interacts with core boot processes, it must be used with a specific order of operations to avoid common pitfalls like getting stuck in a Safe Mode loop.
What is msconfig and Why Use It?
System Configuration (msconfig) is a powerful administrative tool included in Windows 10 and Windows 11. Its primary purpose is to troubleshoot the Windows startup process by controlling which services load at boot, whether the operating system starts in Safe Mode, and which overall startup mode the PC utilizes. It serves as a diagnostic bridge between a fully functional system and one that requires advanced repair.
By using msconfig, you can perform what is known as a “clean boot.” This process starts Windows with a minimal set of drivers and startup programs, helping you determine if a background program is interfering with your software or games. It is important to note that changing these settings requires administrator rights. If you are using a standard user account, Windows will prompt for an administrator’s password. Furthermore, on managed work or school PCs, IT policies may block access to these settings entirely.
Prerequisites and Safety Precautions
Before you begin modifying your system’s boot configuration, preparation is essential to prevent data loss or boot failures. Ensure you have the following ready:
- Administrator Access: You must be logged into an admin account or have the password for the User Account Control (UAC) prompt.
- Documentation: Take a photo or write down the current state of your services and startup items. This ensures you can revert changes manually if needed.
- Recovery Media: Ideally, have a Windows recovery USB flash drive on hand in case the PC fails to boot normally after your changes.
- Work/School Permissions: If the device is managed by an organization, consult your IT department first, as group policies can override msconfig settings.
Additionally, users should be aware that Windows 10 reached its end of support on October 14, 2025. While msconfig remains fully functional on Windows 10, the operating system no longer receives security updates, making troubleshooting on this platform more critical yet potentially more vulnerable.
How to Open System Configuration
There are two primary ways to access the System Configuration tool in both Windows 10 and Windows 11. Both methods lead to the same interface.
Using the Run Command
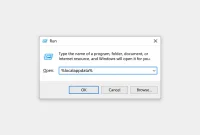
The fastest way to open the tool is via the Run box:
- Press Win + R on your keyboard.
- Type
msconfiginto the box. - Press Enter or click OK.
- If a User Account Control prompt appears, click Yes.
Using Windows Search
If you prefer using the mouse and the GUI:
- Click the Search icon or bar on the taskbar.
- Type
msconfig. - Select System Configuration from the search results.
Once opened, the System Configuration window will default to the General tab.
Understanding the General Tab: Startup Modes
The General tab acts as the master switch for how your PC boots. Understanding these three modes is the first step in learning how to use msconfig windows 11 effectively.
| Startup Mode | Description | When to Use |
|---|---|---|
| Normal startup | Loads all device drivers and services. This is the default state for a healthy PC. | Standard daily use. |
| Diagnostic startup | Loads only basic devices and services. It is similar to Safe Mode but used for broader diagnostics. | Initial troubleshooting of severe system errors. |
| Selective startup | Allows the user to choose whether to load system services or startup items. | Performing a clean boot or isolating specific software conflicts. |
If you find that “Selective startup” is already selected on a PC you haven’t yet touched, it may indicate that a previous troubleshooting session was left unfinished or that a third-party application has altered your boot settings. Always check the Services and Startup tabs before switching back to Normal startup.
Performing a Clean Boot (Services Tab)
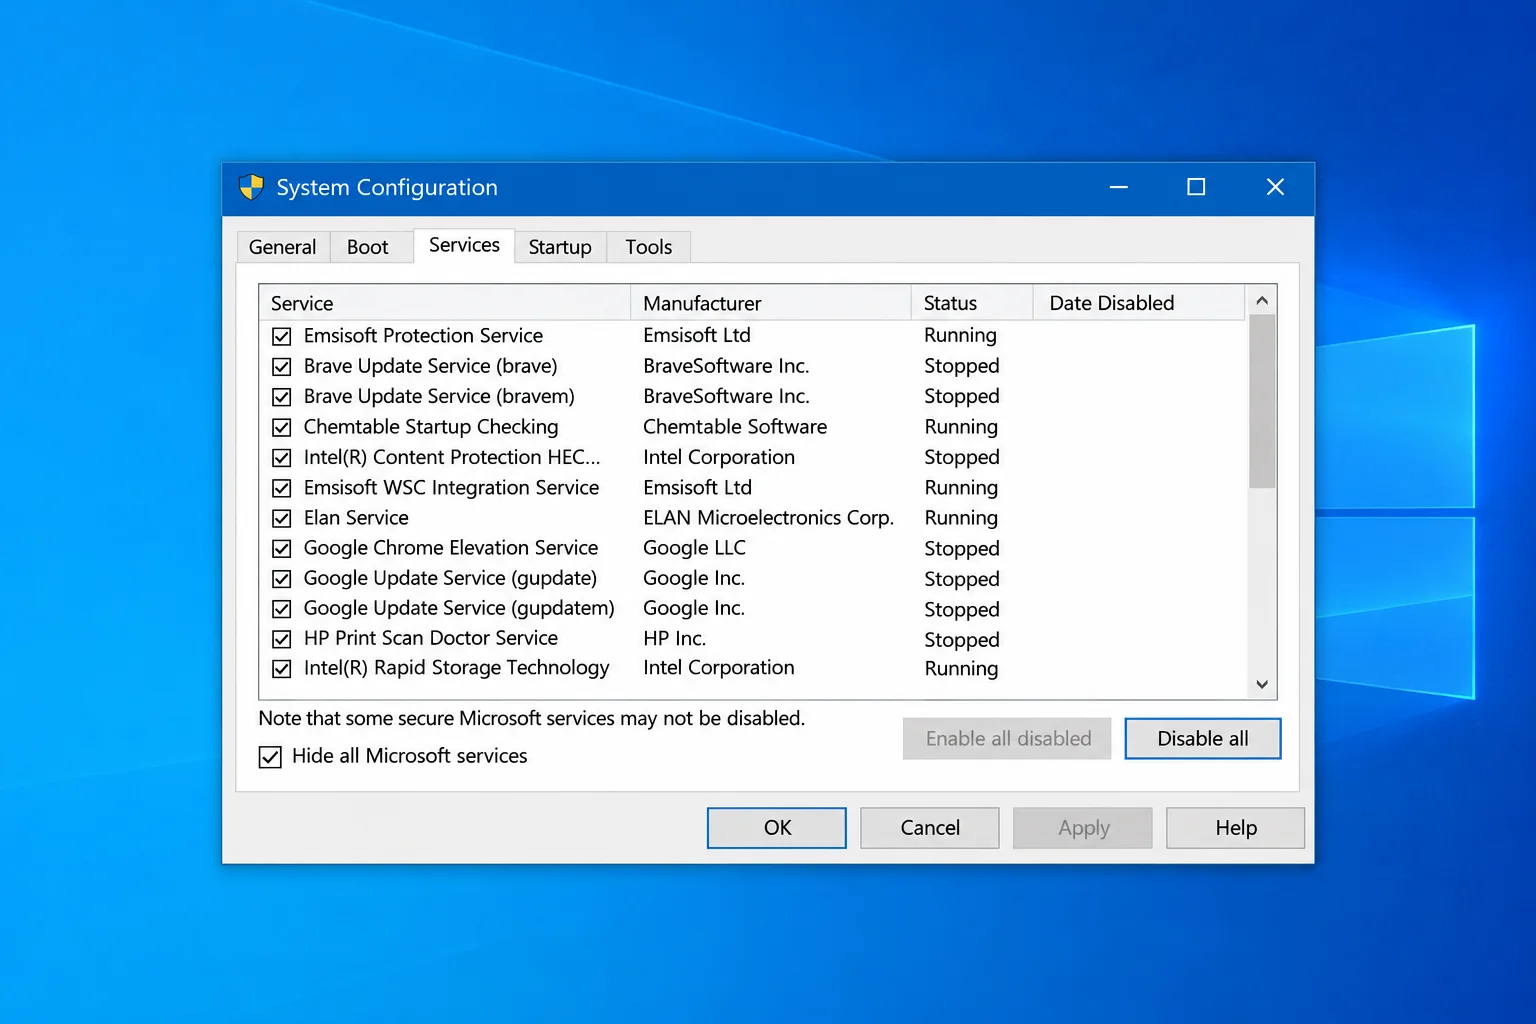
The Services tab is where most troubleshooting occurs, but it is also where users are most likely to cause issues. If you disable essential Microsoft services, Windows may fail to function correctly, potentially locking you out of features like the login screen or Wi-Fi.
The Critical Safety Step
Before making any changes, you must protect the operating system’s core functions:
- Navigate to the Services tab.
- Check the box labeled Hide all Microsoft services at the bottom left. This is the most important step.
- The list will now filter to show only third-party services (such as those from NVIDIA, Google, Steam, or your printer manufacturer).
- Click Disable all to prevent these third-party services from starting with Windows.
The “Bisecting” Method
If your problem disappears after disabling all third-party services, you can find the specific culprit using the “halving” method. Re-enable half of the third-party services and restart. If the problem returns, the culprit is in that half. If it doesn’t, the culprit is in the other half. Continue halving the list until only one service remains identified as the cause of the conflict.
Managing Startup Apps
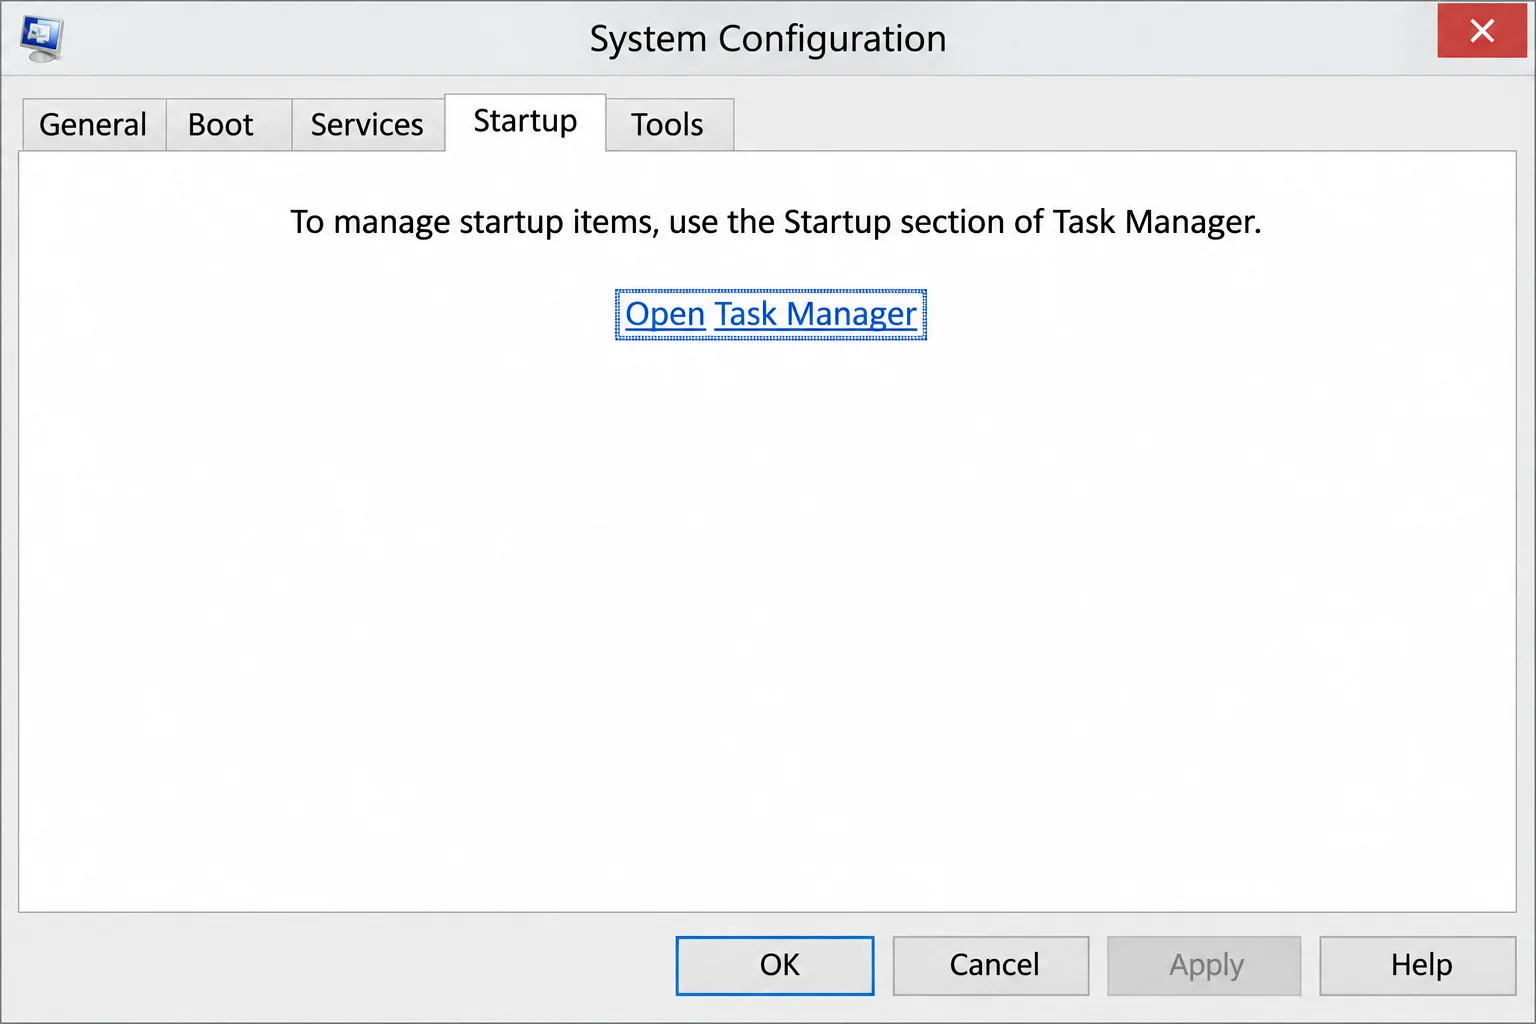
In older versions of Windows, you could manage startup programs directly within msconfig. In Windows 10 and Windows 11, the Startup tab now serves as a redirect to more modern management interfaces.
Using Task Manager
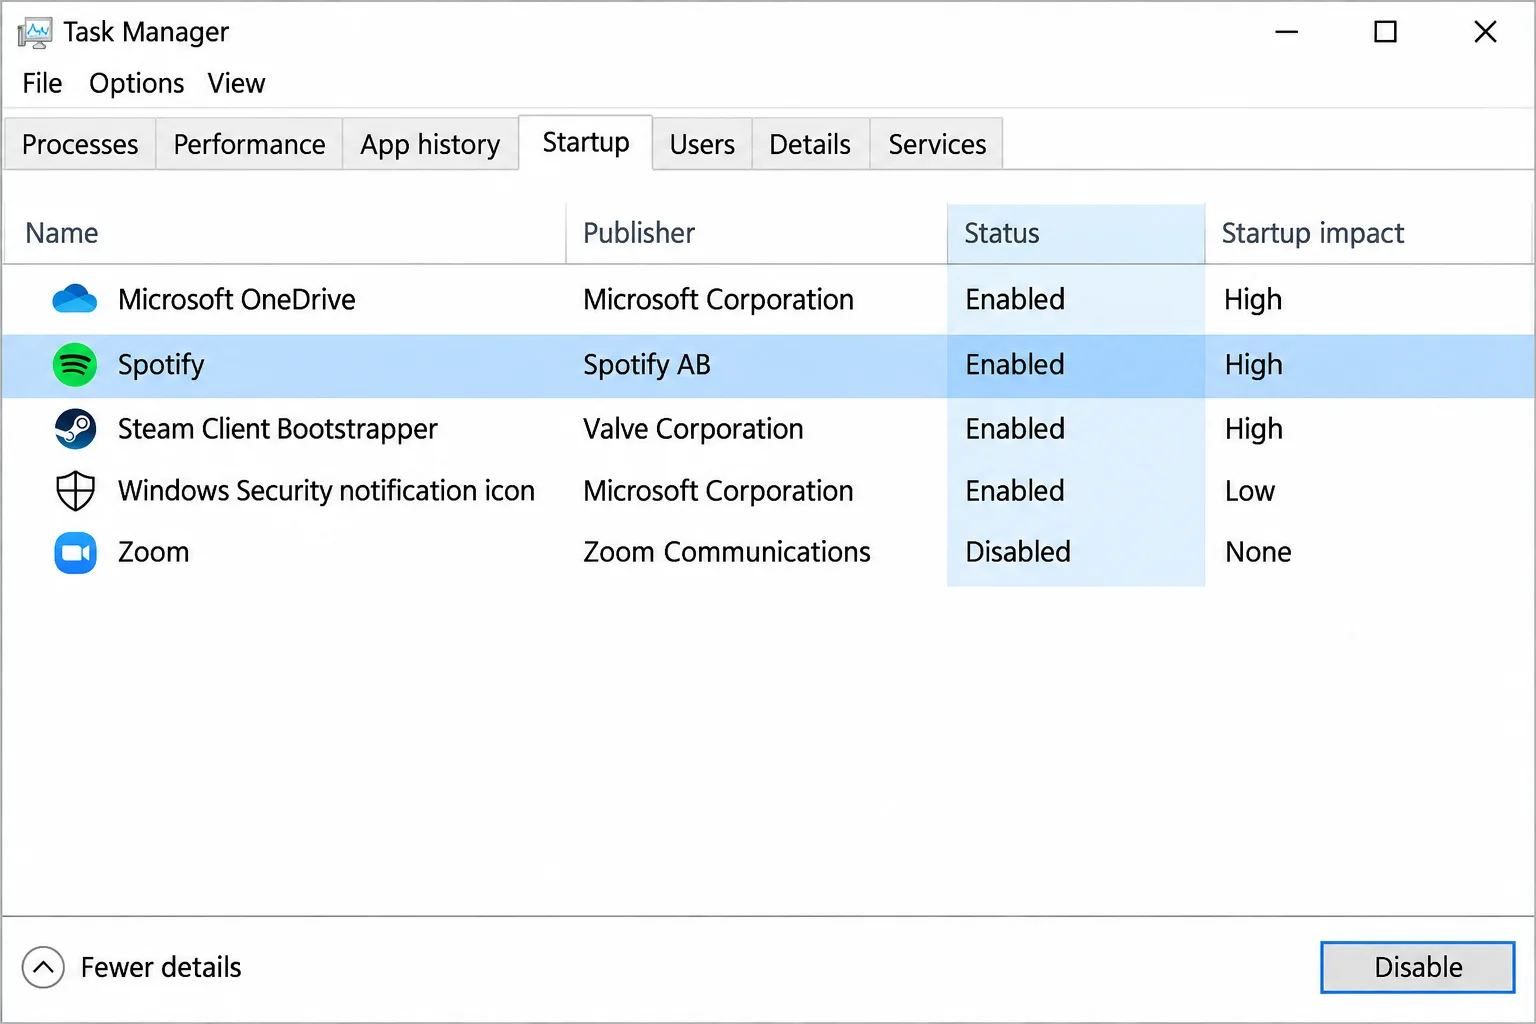
When you click the Startup tab in msconfig and then click Open Task Manager, you are taken to a detailed list of applications that launch at sign-in. This view is superior for diagnosis because it includes a “Startup impact” column, showing which apps are slowing down your boot time the most. To disable an app, right-click it and select Disable.
Using Windows Settings
For a simpler view, you can navigate to Settings > Apps > Startup. This provides simple on/off toggles for startup applications. While easier to read, it lacks the technical impact data provided by Task Manager.
Using the Boot Tab for Safe Mode
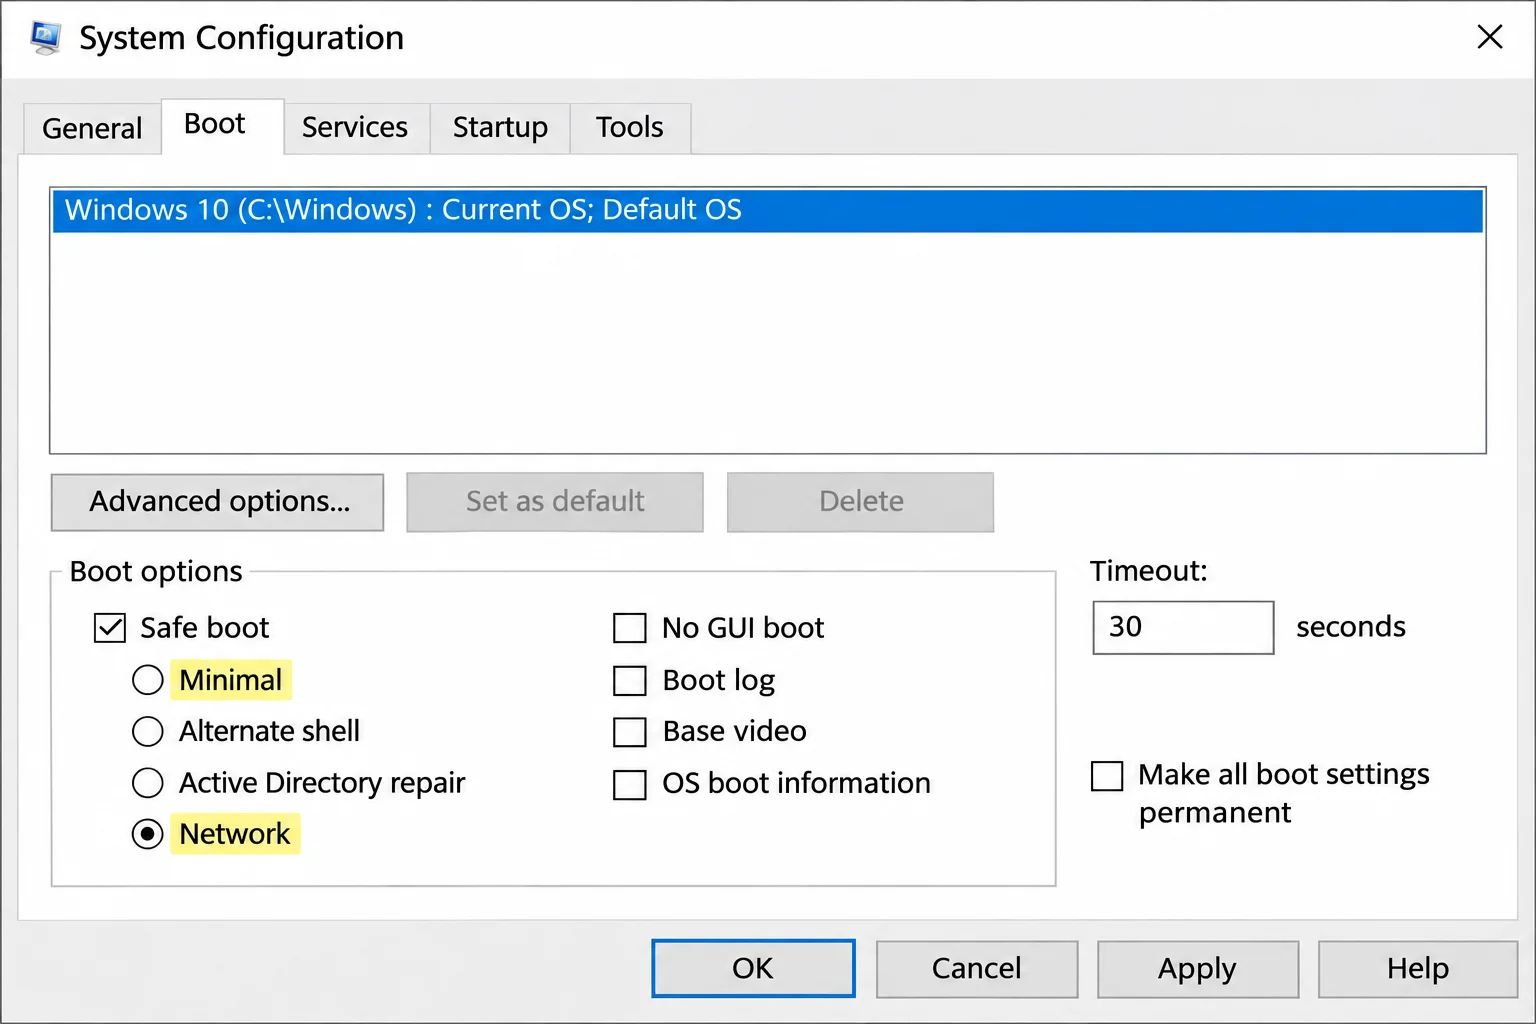
The Boot tab is used when you need to force Windows into Safe Mode. Unlike the one-time boot options found in the Recovery Environment, Safe Mode set via msconfig is persistent—the PC will continue to boot into Safe Mode until you manually turn the setting off.
Safe Boot Options
- Minimal: Boots into Safe Mode without network drivers. This is the standard choice for most repairs.
- Network: Boots into Safe Mode with network drivers enabled, allowing internet access.
- Alternate shell: Boots to a Command Prompt instead of the graphical Windows desktop.
- Active Directory repair: Used for domain controllers; typically ignored for home or standard office PCs.
Warning: Avoid the “Advanced options” button in the Boot tab unless specifically instructed by a professional. Settings like “Number of processors” and “Maximum memory” are intended for IT diagnostics to simulate hardware limitations. They will not make your PC faster and can cause significant performance issues if misconfigured.
How to Exit a Safe Mode Loop
The most common user error with msconfig is forgetting to uncheck the “Safe boot” box, leading to a “Safe Mode loop.”
The Standard Fix
If you can still sign in to Windows while in Safe Mode:
- Open msconfig using Win + R.
- Go to the Boot tab.
- Uncheck Safe boot.
- Click Apply and OK, then restart.
The Recovery Environment Fix
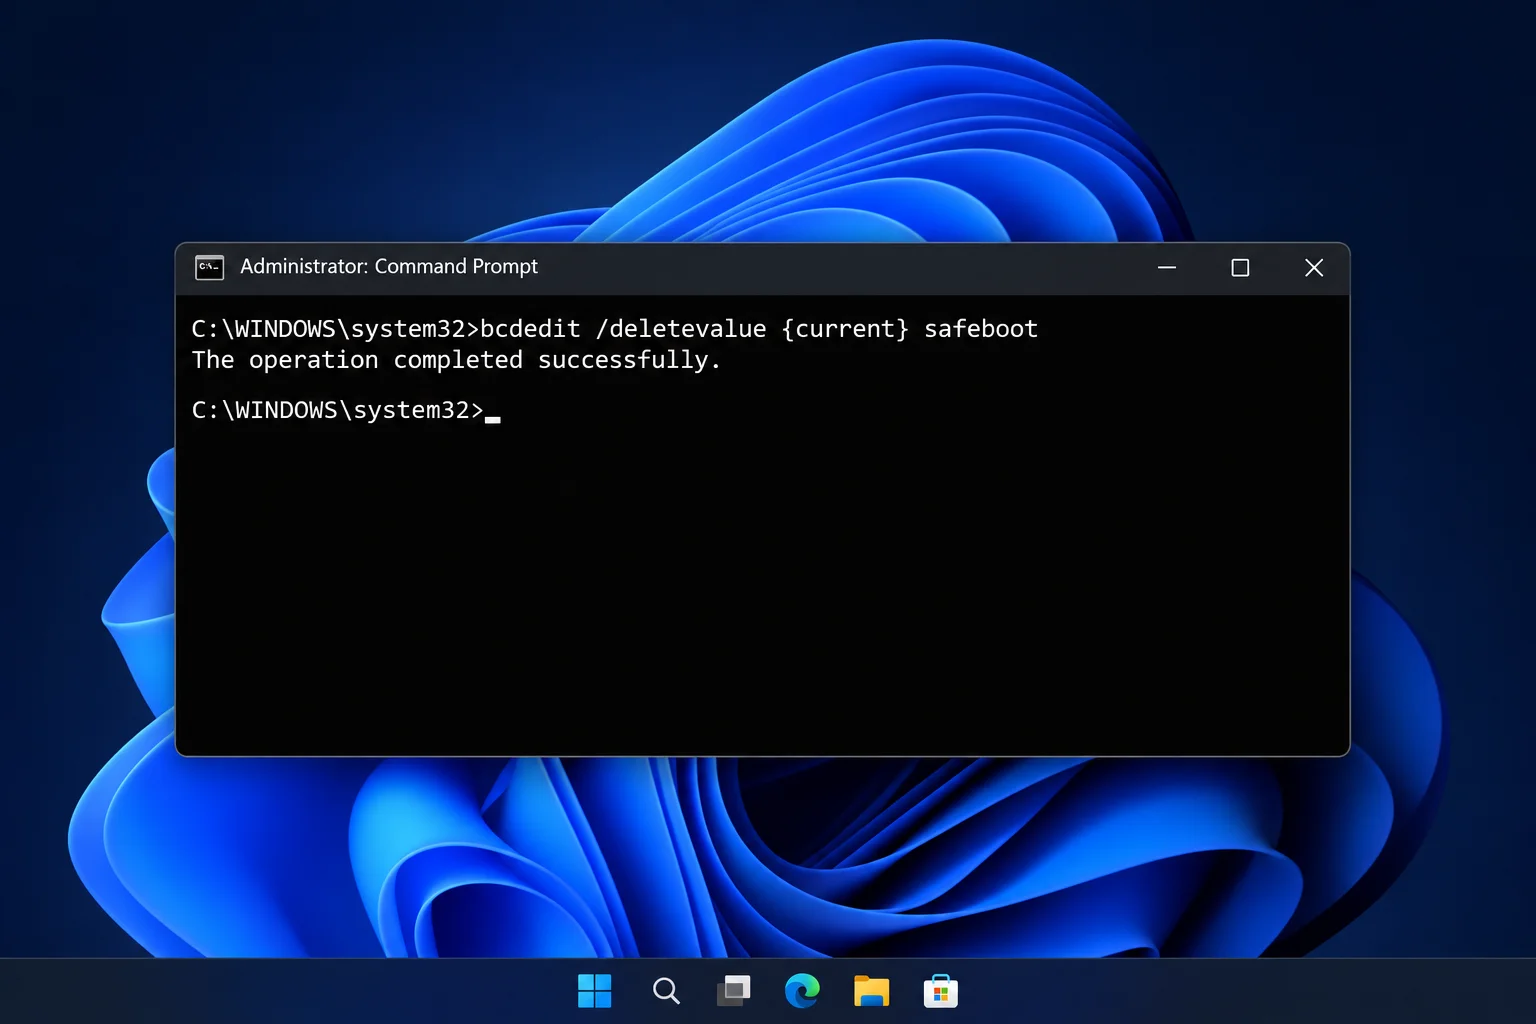
If you are stuck in Safe Mode and cannot sign in, you must use the Command Prompt from the Windows Recovery Environment (WinRE):
- On the sign-in screen, hold Shift and select Power > Restart.
- Navigate to Troubleshoot > Advanced options > Command Prompt.
- Type
bcdedit /enumand press Enter. Locate the “Windows Boot Loader” entry and check the identifier (usually{default}). - Run the following command:
bcdedit /deletevalue {default} safeboot(Replace{default}with your specific identifier if it differs). - Close the prompt and select Continue to start Windows normally.
Troubleshooting Common msconfig Issues
Why did my internet stop working in Safe Mode?
This happens if you chose “Minimal” instead of “Network” in the Boot tab. Minimal Safe boot intentionally leaves out network drivers to isolate core system issues. To fix this, return to the Boot tab in msconfig and switch the selection to Network.
What if msconfig is blocked by policy?
On managed devices, Group Policy often overrides System Configuration to prevent users from accidentally disabling security services. In this case, you must contact your IT department to make changes centrally.
I accidentally disabled Microsoft services. Now what?
If you clicked “Disable all” without hiding Microsoft services first, many Windows features will break. To fix this, open the Services tab, ensure “Hide all Microsoft services” is unchecked, and sort the list by the “Manufacturer” column. Manually re-check all services listed under “Microsoft Corporation,” click Apply, and restart. Do not simply click “Enable all,” as this will also re-enable the third-party services you were trying to isolate.
Mastering how to use msconfig windows 11 is a vital skill for maintaining system health. By following the correct order—hiding Microsoft services first and documenting your changes—you can safely navigate the complexities of Windows startup. If problems persist even after a clean boot and Safe Mode testing, the issue may lie with hardware failure (such as bad RAM or a failing SSD) or malware, requiring further specialized diagnostic tools.