
Coupon toolbars, unwanted add-ons, and unauthorized utilities can quickly clutter Microsoft Edge across managed environments. For system administrators and IT professionals managing Windows PCs, leveraging Microsoft Edge extensions Group Policy offers a robust, built-in alternative to cloud-based management tools like Microsoft Intune. By installing the official Microsoft Edge policy templates, administrators can precisely control browser add-ons by blocking unwanted extensions, carving out exceptions with allowlists, or silently force-installing critical security tools.
Prerequisites and Core Concepts for Edge Extension Management
Group Policy is a native feature built into qualifying Windows editions, including Windows Pro, Enterprise, and Education. Windows Home editions do not support the Group Policy Editor (gpedit.msc), making a Pro upgrade the simplest path for home office or small business environments. Additionally, deploying domain-level GPOs requires appropriate Group Policy management rights within your Active Directory domain.
It is important to note that macOS devices do not utilize Group Policy and must instead manage Microsoft Edge extensions through MDM profiles. Furthermore, Microsoft Intune is typically reserved for cloud-managed PCs that are not joined to a local domain, but it is not required for the local and domain-based GPO steps outlined in this guide.
Microsoft Edge reads policies pushed down by Windows, with three primary policies dedicated to browser extensions:
- ExtensionInstallBlocklist: Prevents users from installing specified extension IDs. Setting the value to a single asterisk (*) blocks all extensions universally.
- ExtensionInstallAllowlist: Creates exceptions to a restrictive blocklist, allowing designated extensions to function.
- ExtensionInstallForcelist: Silently installs mandatory extensions automatically, preventing users from removing or disabling them. Microsoft documentation confirms that the forcelist supersedes the blocklist, meaning a forced extension will install successfully even when the blocklist is set to *. Note that on non-domain-joined Windows PCs, forced installations are strictly limited to extensions hosted on the official Microsoft Edge Add-ons website.
Step 1: Download the Microsoft Edge Policy Templates
To begin configuring browser controls, you must acquire the administrative template files provided by Microsoft, which are packaged separately from the core browser installer.
- Open the official Microsoft Edge for Business download page in your web browser.
- Select your preferred Edge channel—Stable is recommended for standard managed production PCs—and choose Windows as your target platform.
- Locate and download the Microsoft Edge policy templates package. Look specifically for the “policy templates” link rather than the standard browser installer link, as Microsoft periodically reorganizes this download portal.
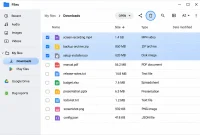
Once downloaded, a compressed policy templates package will sit in your local Downloads folder, ready for deployment.
Step 2: Install Policy Templates on Local Machines or Domain Central Store
The downloaded package contains ADMX and ADML template files that must be placed in the correct system directories so the Local Group Policy Editor can recognize them.
- Extract the downloaded archive and open the MicrosoftEdgePolicyTemplateswindowsadmx directory.
- Copy the core template files msedge.admx and msedgeupdate.admx directly into C:WindowsPolicyDefinitions.
- Navigate into the language subfolder matching your Windows display language, such as en-US.
- Copy the corresponding language files msedge.adml and msedgeupdate.adml into C:WindowsPolicyDefinitionsen-US (or your respective language directory).
- Click Continue if prompted by Windows for administrator permissions.
For Active Directory domain environments, copy these exact files into your Central Store located at \<domain>SYSVOL<domain>PoliciesPolicyDefinitions, ensuring the .adml files are placed within the matching language subfolder there as well. A mismatched language folder name is the most common reason the Edge configuration node fails to appear.
Step 3: Locate Extension Policies in Group Policy Editor
With the administrative templates successfully installed, you can access the configuration nodes via the Group Policy Editor.
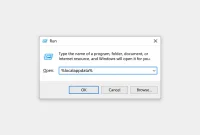
- Press Win + R, type gpedit.msc, and press Enter to launch the Local Group Policy Editor.
- Navigate to Computer Configuration > Administrative Templates > Microsoft Edge > Extensions.
- For domain-wide rollouts, open the Group Policy Management Console (GPMC), right-click your target GPO, choose Edit, and follow the identical path under Computer Configuration > Policies.
Ensure you use the top-level Microsoft Edge folder added by your newly installed templates, rather than older legacy folders found under Windows Components. Configuring these policies under Computer Configuration ensures they apply globally to every user profile on the machine.
Step 4: Identify and Gather Extension IDs
Every extension policy relies on unique alphanumeric extension IDs rather than human-readable display names. Guessing names will result in misconfigured rules.
You can identify an extension ID using two primary methods:
- Navigate to edge://extensions in your browser, enable Developer mode, and copy the unique ID displayed directly beneath the extension name.
- Alternatively, view the extension on the Microsoft Edge Add-ons store website and copy the final string of characters at the end of the store URL.
Maintain a secure text file containing the exact IDs you intend to block, allow, or force-install to simplify auditing and future policy rollbacks.
Step 5: Block Unwanted or All Extensions
To restrict unauthorized add-ons, configure the blocklist policy:
- Double-click the policy titled Control which extensions cannot be installed.
- Click Show next to configure extension IDs. Enter one extension ID per row. To implement a complete lockdown and block all add-ons universally, enter a single asterisk (*).
- Click Apply and OK to save the setting.
When an extension is blocked, Edge typically disables the item rather than entirely deleting it, leaving it visible on edge://extensions in a greyed-out, disabled state. To undo this change later, simply set the policy back to Not Configured.
Step 6: Allow Specific Extensions
If you have implemented a strict blocklist via an asterisk (*) but need to permit essential productivity tools, you must carve out explicit exceptions.
- Double-click the policy titled Allow specific extensions to be installed.
- Enter each approved extension ID on its own separate row. Essential enterprise picks typically include password managers or corporate security extensions.
- Save your configuration.
Users will now be restricted to installing solely the approved extensions, while all other third-party add-ons remain blocked or disabled.
Step 7: Force-Install Mandatory Extensions
For mandatory security utilities or corporate VPN clients, silent forced installation ensures compliance without requiring manual user interaction.
- Double-click the policy titled Control which extensions are installed silently.
- Enter entries using the precise format extension_id;update_url with one entry per row. For standard store extensions, Microsoft’s official documentation provides the current update URL to use.
- Save the policy.
Edge will automatically install the extension upon its next policy refresh, locking the setting so users cannot disable or remove it. Note that self-hosted extensions—those hosted on internal corporate servers rather than the public Add-ons store—require the target Windows PC to be joined to an Active Directory domain or Microsoft Entra hybrid joined; pure Microsoft Entra-joined devices will fail for self-hosted packages.
Step 8: Apply and Verify Policies
Never assume a policy has taken effect without confirming it directly within the operating system and browser interface.
- Right-click the Start menu and choose Terminal (Admin) on Windows 11 or PowerShell (Admin) on Windows 10.
- Type gpupdate /force and press Enter, waiting until the console confirms that “Computer Policy update has completed successfully.”
- Open Microsoft Edge, navigate to edge://policy, and click Reload policies at the top of the page.
- Verify that your target policies (ExtensionInstallBlocklist, ExtensionInstallAllowlist, or ExtensionInstallForcelist) appear with your exact values and show no status errors.
- Finally, open edge://extensions to confirm that blocked items appear disabled and forced extensions display as managed by your organization.
Common Deployment Scenarios and Strategies
Administrators can combine these core policies to fit various operational environments:
- Shared or Family PC Lockdown: Set a blocklist value of * combined with an allowlist containing three to five approved IDs to permanently eliminate toolbar junk.
- Mandatory Enterprise Tool: Configure the forcelist policy alone while leaving the blocklist and allowlist unconfigured to deploy necessary security software without restricting other user choices.
- Strict Corporate Environment: Utilize a blocklist of *, an allowlist for optional approved utilities, and a forcelist for mandatory enterprise tools.
For advanced deployments across large browser fleets, administrators can alternatively utilize the consolidated ExtensionSettings policy, which combines blocklists, allowlists, and forcelists into a single JSON string, though the three classic policies remain significantly easier to audit on individual PCs.
Troubleshooting Common Edge Policy Issues
If your configured policies fail to behave as expected, review these common troubleshooting scenarios and fixes:
- The Microsoft Edge folder is missing in Group Policy Editor: This occurs when ADMX files are missing from PolicyDefinitions or ADML files reside in the wrong language directory. Recopy the files to the correct paths and restart gpedit.msc.
- Policies do not update in Edge: Windows has likely not refreshed the local cache. Run gpupdate /force, restart Edge, and click Reload policies at edge://policy.
- Self-hosted force-installed extensions fail to appear: Verify that your entry uses the exact extension_id;update_url syntax without spaces, validate your update manifest XML, and ensure the device has an Active Directory or hybrid Entra join.