
When you try to remove an old printer driver in Windows 11, you might encounter the frustrating error message stating that the specified printer driver is currently in use. Alternatively, you may find that a printer you previously deleted keeps reappearing automatically. Leftover printer entries, stuck print jobs, and driver packages still lingering in the Windows Driver Store are the primary causes behind these issues. Fortunately, you can clear them completely using built-in Windows 11 tools.
Why Printer Drivers Refuse to Uninstall in Windows 11
The standard Remove button located in Settings > Bluetooth & devices > Printers & scanners only deletes the visible printer entry. It does not delete the underlying driver package. Windows actively refuses to delete that package as long as any system component still points to it. Common culprits include a leftover printer entry, a stuck print job, or another installed printer that happens to share the exact same package.
Additionally, a hidden ghost device living inside Device Manager that no longer shows up in your main settings can make a deleted printer come back unexpectedly. Because Windows manages your printing architecture across separate layers—specifically the printer entry, the hidden device entry, and the driver package—clearing just one layer does not automatically clear the others.
To remove old printer drivers in Windows 11 completely, you must work through these layers in the correct chronological order:
- Remove the printer entry and any hidden printer devices.
- Release file locks by restarting the Print Spooler service.
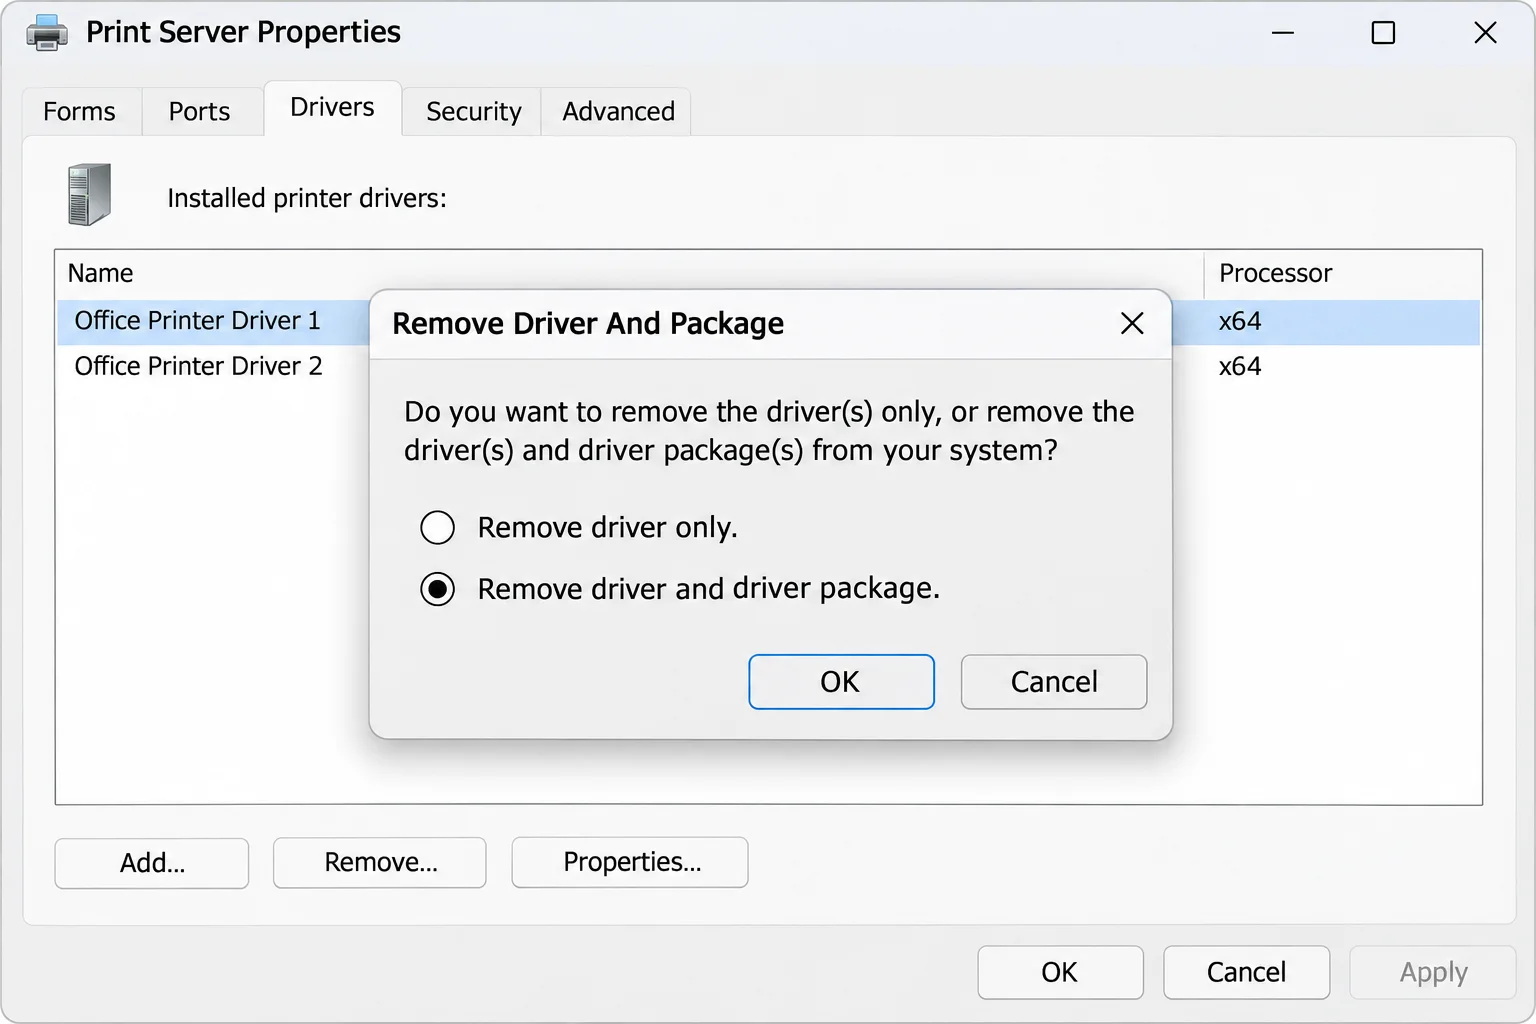
- Delete the driver package using Print Server Properties.
- If necessary, force the stubborn driver out of the Driver Store using PnPUtil.
- Install a clean, working replacement driver.
Preparation and Safety Steps Before You Begin
Before diving into advanced removal procedures, make sure you complete these essential preparations and safety checks:
- Verify that you are signed in to an administrator account on Windows 11 Home or Pro.
- Ensure you can open Terminal, PowerShell, or Command Prompt with administrator privileges.
- Unplug your USB printer cable, or power off and disconnect your network printer from the local network.
- Note down the exact printer model so you can match the correct replacement driver later.
- Write down every other printer installed on your PC, as a forced driver removal can inadvertently affect other printers sharing the same package files.
- Save your open work, since several steps require restarting system services or your computer.
- Create a System Restore point, because removing system driver packages can occasionally impact other hardware sharing the same files.
Warning: Always disconnect your printer first. If it stays plugged in or active on the network, Windows can easily rediscover and reinstall the driver while you are trying to clean it up.
Step-by-Step Guide to Completely Removing Printer Drivers
Work through the following sequential fixes to eradicate corrupted or lingering printer drivers from your system.
Fix 1: Remove the Printer in Windows Settings
Start by removing every visible copy of the printer from your system settings, as Windows will refuse to release the driver package while a printer profile still utilizes it.
- Unplug the printer’s USB cable or power off the network printer.
- Navigate to Settings > Bluetooth & devices > Printers & scanners.
- Click on the old printer you want to remove and select Remove.
- Repeat this process for any duplicate listings, such as Copy 1 or Copy 2 versions of the same printer.
At this stage, the printer no longer appears under your active settings, though the underlying driver remains installed.
Fix 2: Remove Hidden Printer Devices in Device Manager
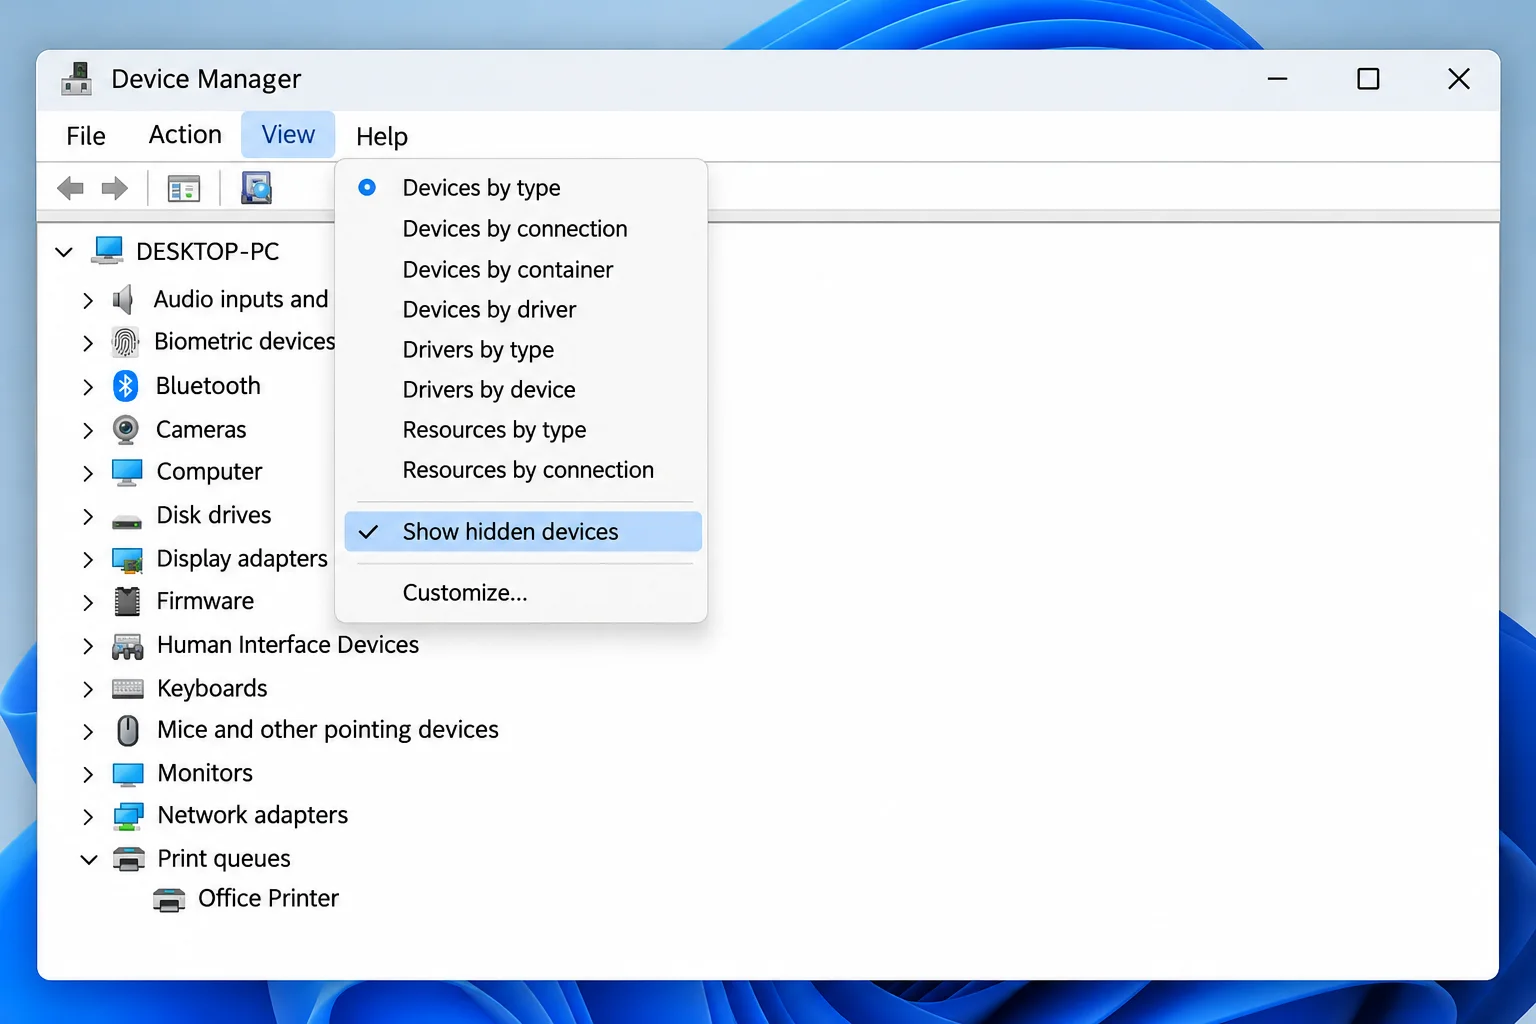
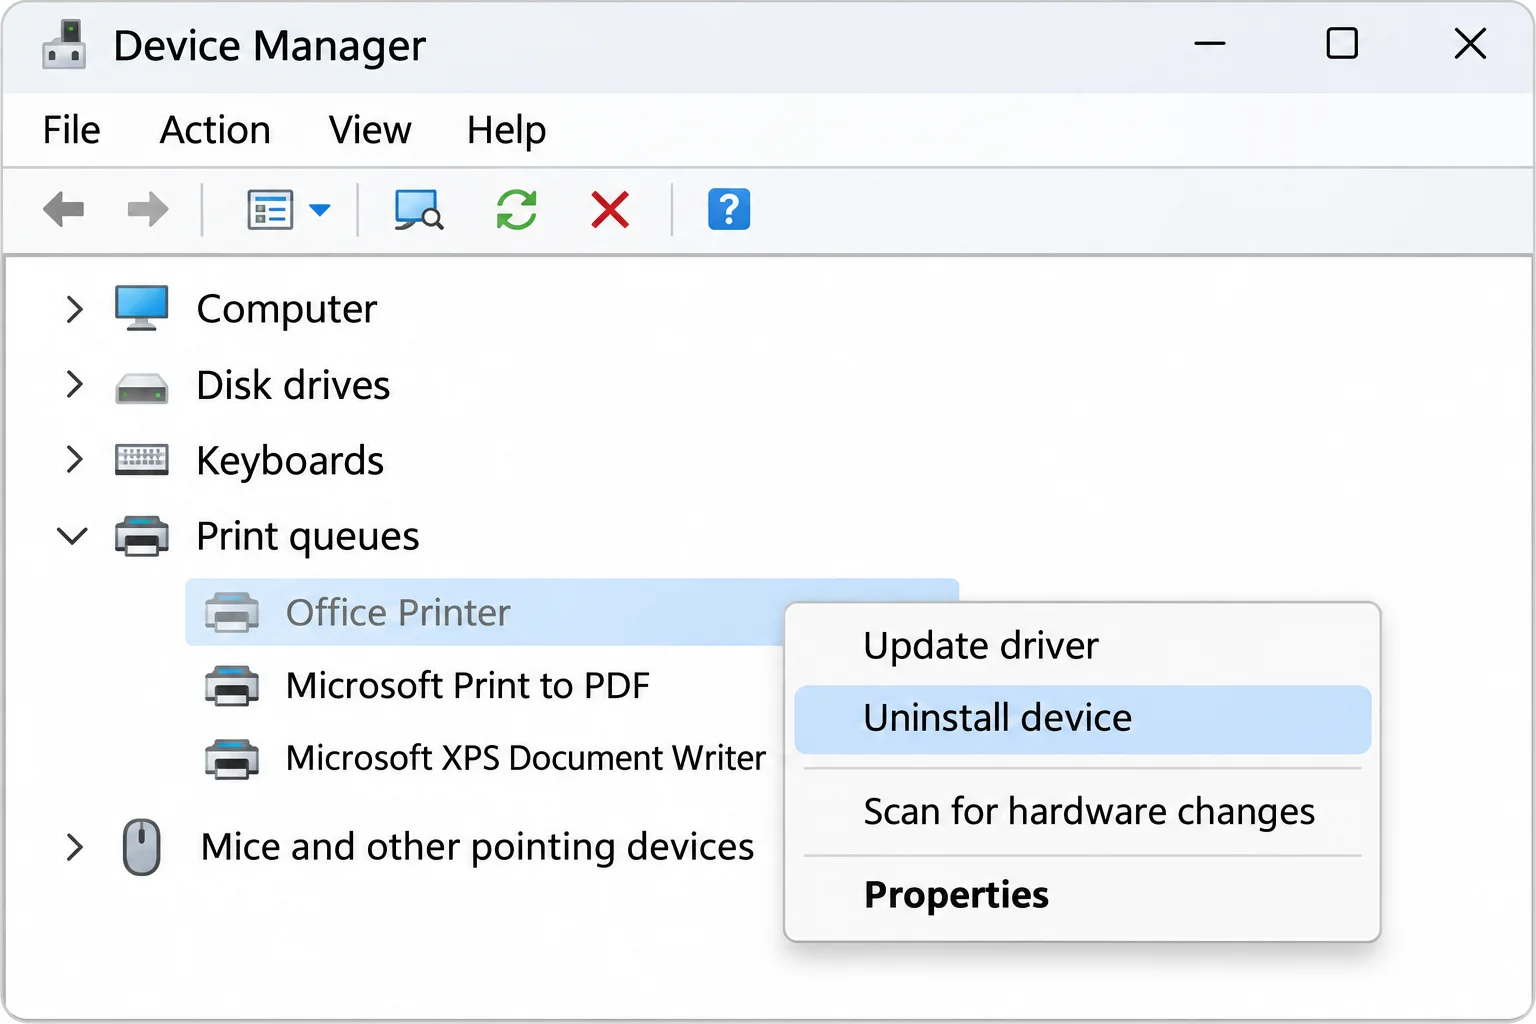
An old printer can leave behind hidden device entries or print queues. Reconnecting your machine can trigger Windows to rediscover and reinstall these items. Clearing them stops the printer from resurrecting itself.
- Right-click the Start button and select Device Manager.
- Click on the View menu and select Show hidden devices.
- Expand the Print queues section, and also check Printers and Software devices if applicable.
- Look for faded, semi-transparent entries named after your old printer.
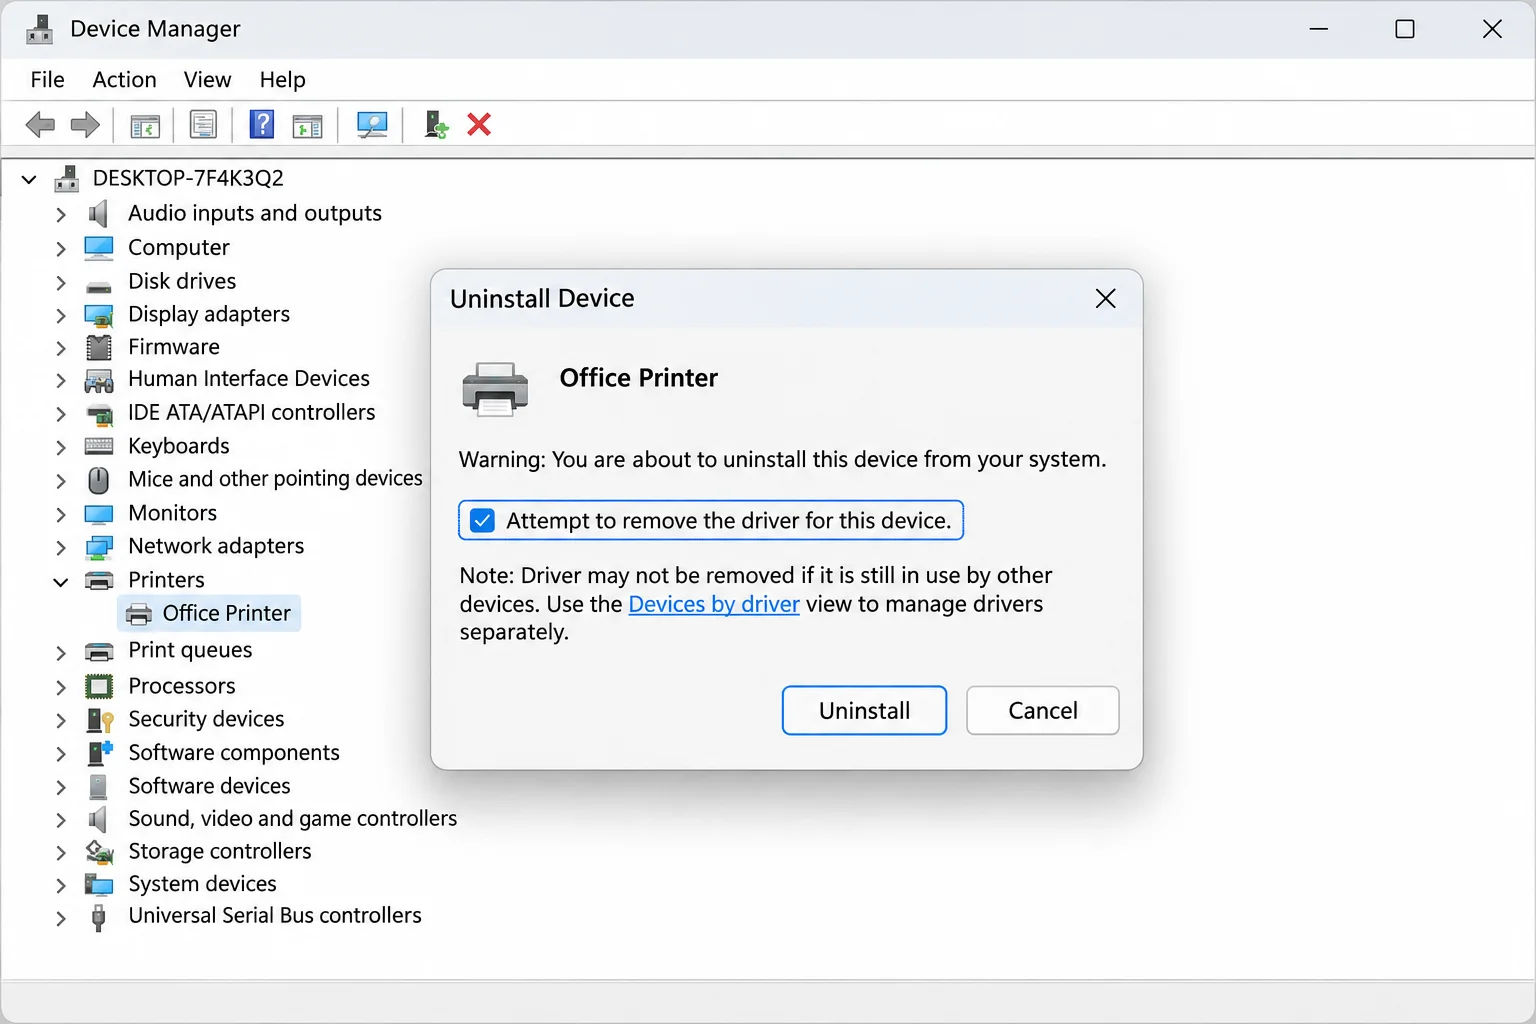
- Right-click the hidden entry and select Uninstall device.
- In the confirmation dialog, check the box to delete the driver software for this device if available, then confirm.
Warning: Only remove hidden device entries that clearly belong to the specific printer you are cleaning up. Leave all other unrelated hardware alone.
Fix 3: Restart the Print Spooler Service
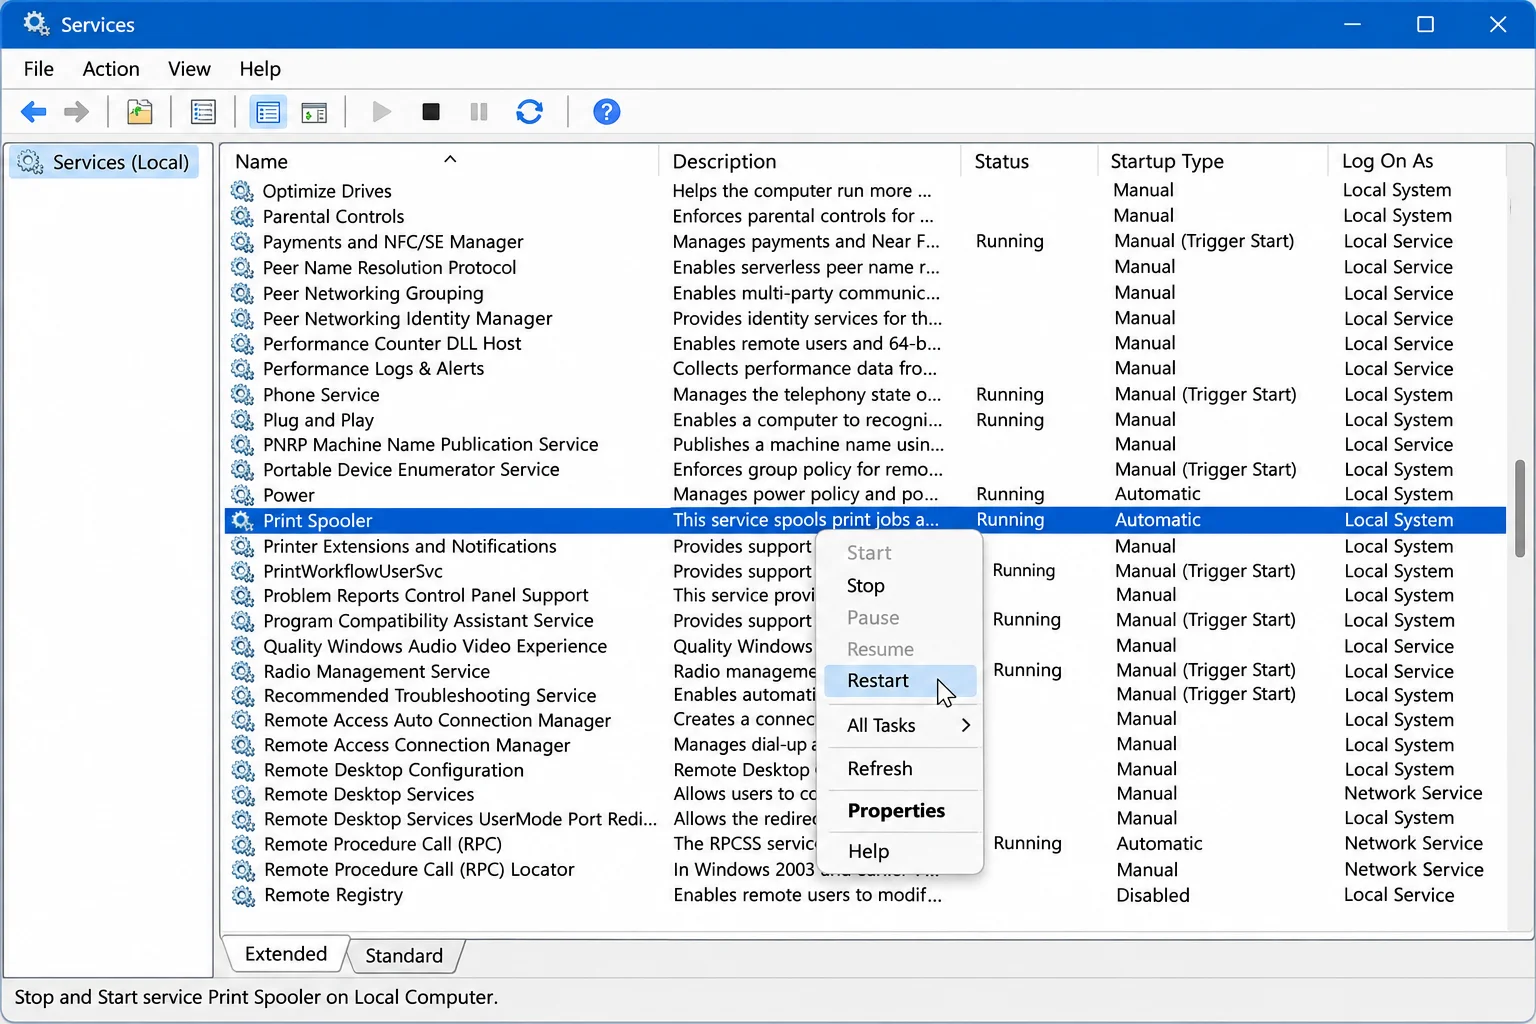
The Print Spooler can keep driver files locked and open even after the printer device is gone. Restarting the service frequently releases those handles.
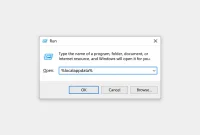
- Press Win + R, type services.msc, and press Enter.
- Scroll down, right-click Print Spooler, and select Restart.
The service will pause briefly and return to a Running status without throwing error dialogs.
Fix 4: Remove the Driver in Print Server Properties
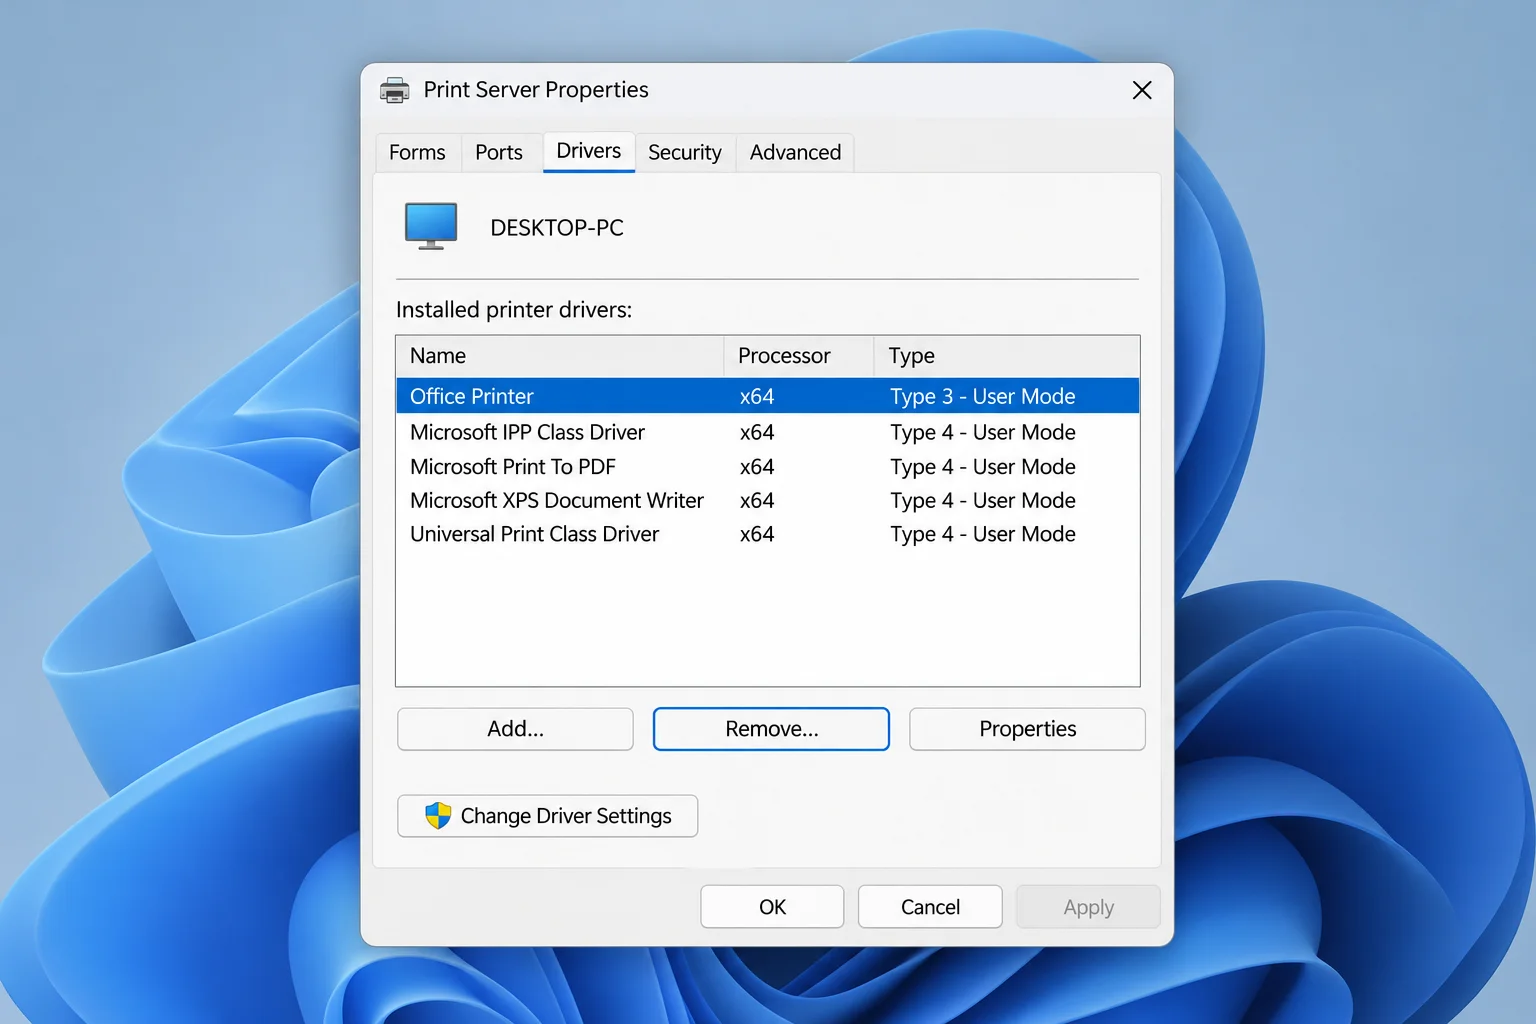
The classic Print Server Properties dialog provides direct access to driver removal options without requiring the complete Print Management snap-in (which is frequently missing on Windows 11 Home editions).
- Press Win + R, type printui /s /t2, and press Enter.
- In the Print Server Properties window, make sure you are on the Drivers tab.
- Find the old printer driver in the list and select it.
- Click Remove driver and driver package, then click OK.
- Confirm any subsequent prompts and click Delete if Windows lists the package for removal.
If Windows reports that the driver is still in use, review Fix 1 and Fix 2 to ensure no leftover printer entries or hidden devices remain, restart the Print Spooler via Fix 3, and try again. If it continues to fail, proceed to the command-line tools.
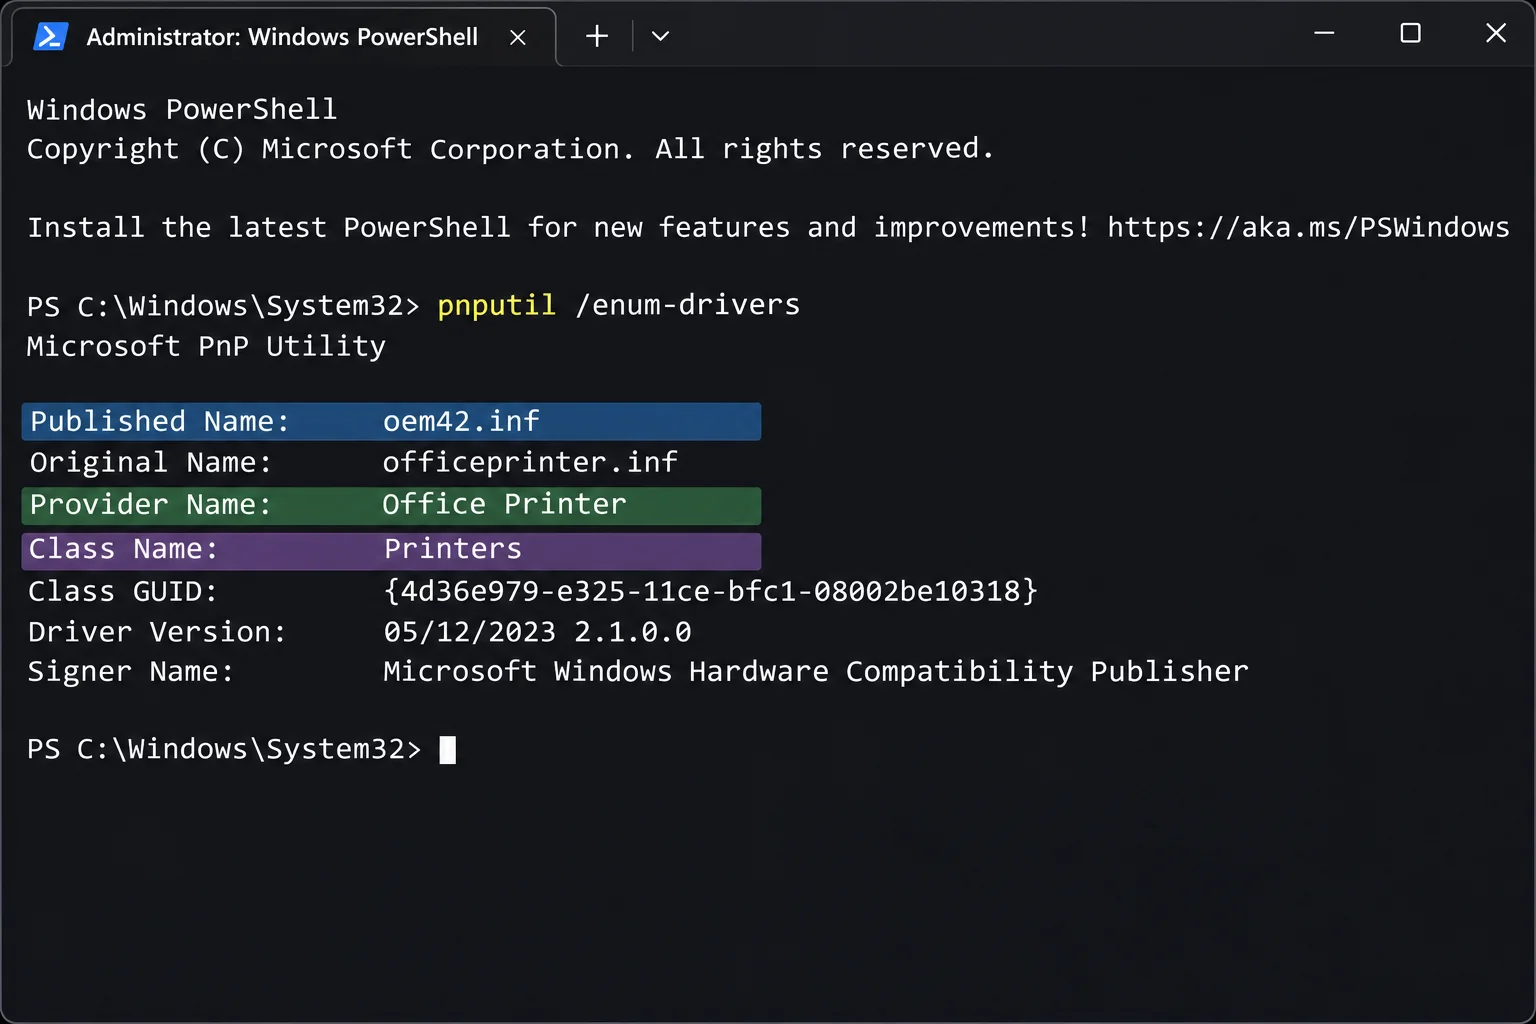
Fix 5: Find the Driver’s Published Name with PnPUtil
When graphical menus refuse to release a package, PnPUtil can manage the Windows Driver Store directly. First, you must identify the package’s exact published name (such as oem23.inf).
- Right-click Start and select Terminal (Admin) or Command Prompt (Admin).
- Type pnputil /enum-drivers and press Enter.
- Scroll through the output to find an entry where the Class Name is Printers and the provider matches your printer brand.
- Cross-reference the Driver Version and Driver Date with your installed printer properties, then note down the exact Published Name (e.g., oem23.inf).
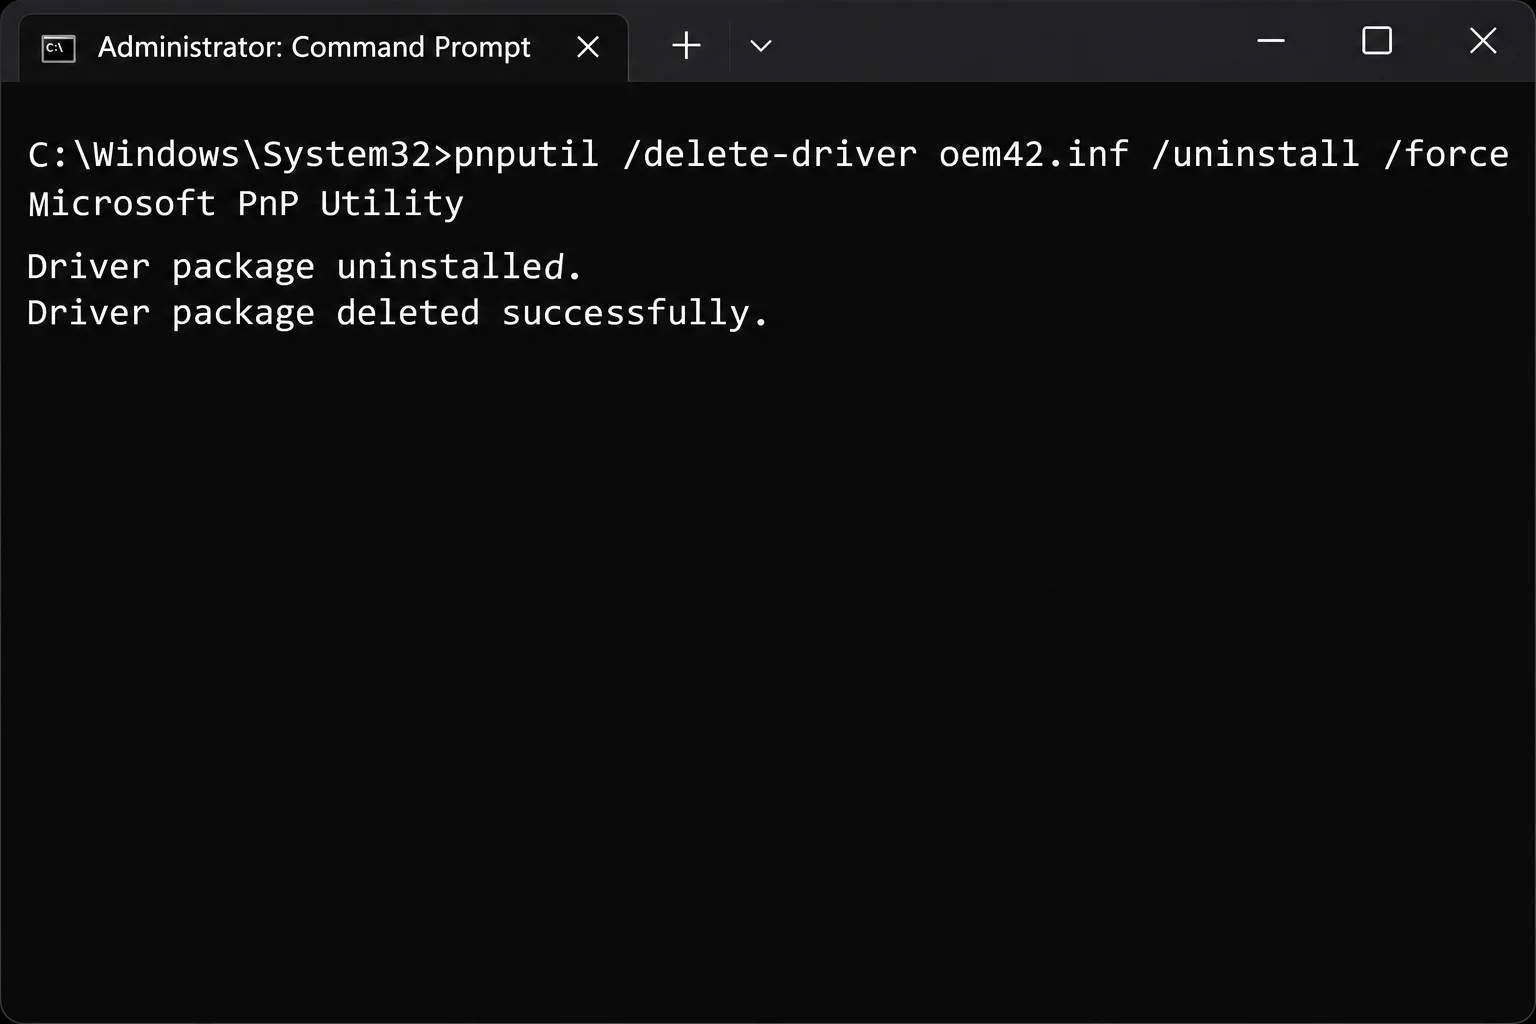
Fix 6: Force-Delete the Driver Package with PnPUtil
Once you have identified the precise INF name, you can force the system to purge the package entirely.
- In your administrator Terminal, run the standard removal command first: pnputil /delete-driver oem23.inf /uninstall (replace oem23.inf with your actual published name).
- If it fails because the package is still in use, execute the forced command: pnputil /delete-driver oem23.inf /uninstall /force.
- Confirm the package has been successfully removed by running pnputil /enum-drivers once more.
- Restart your computer to ensure the spooler and Driver Store fully release all file handles.
Installing a Clean Replacement Driver
With the corrupted files completely purged, you can now install a fresh, stable driver using one of two methods:
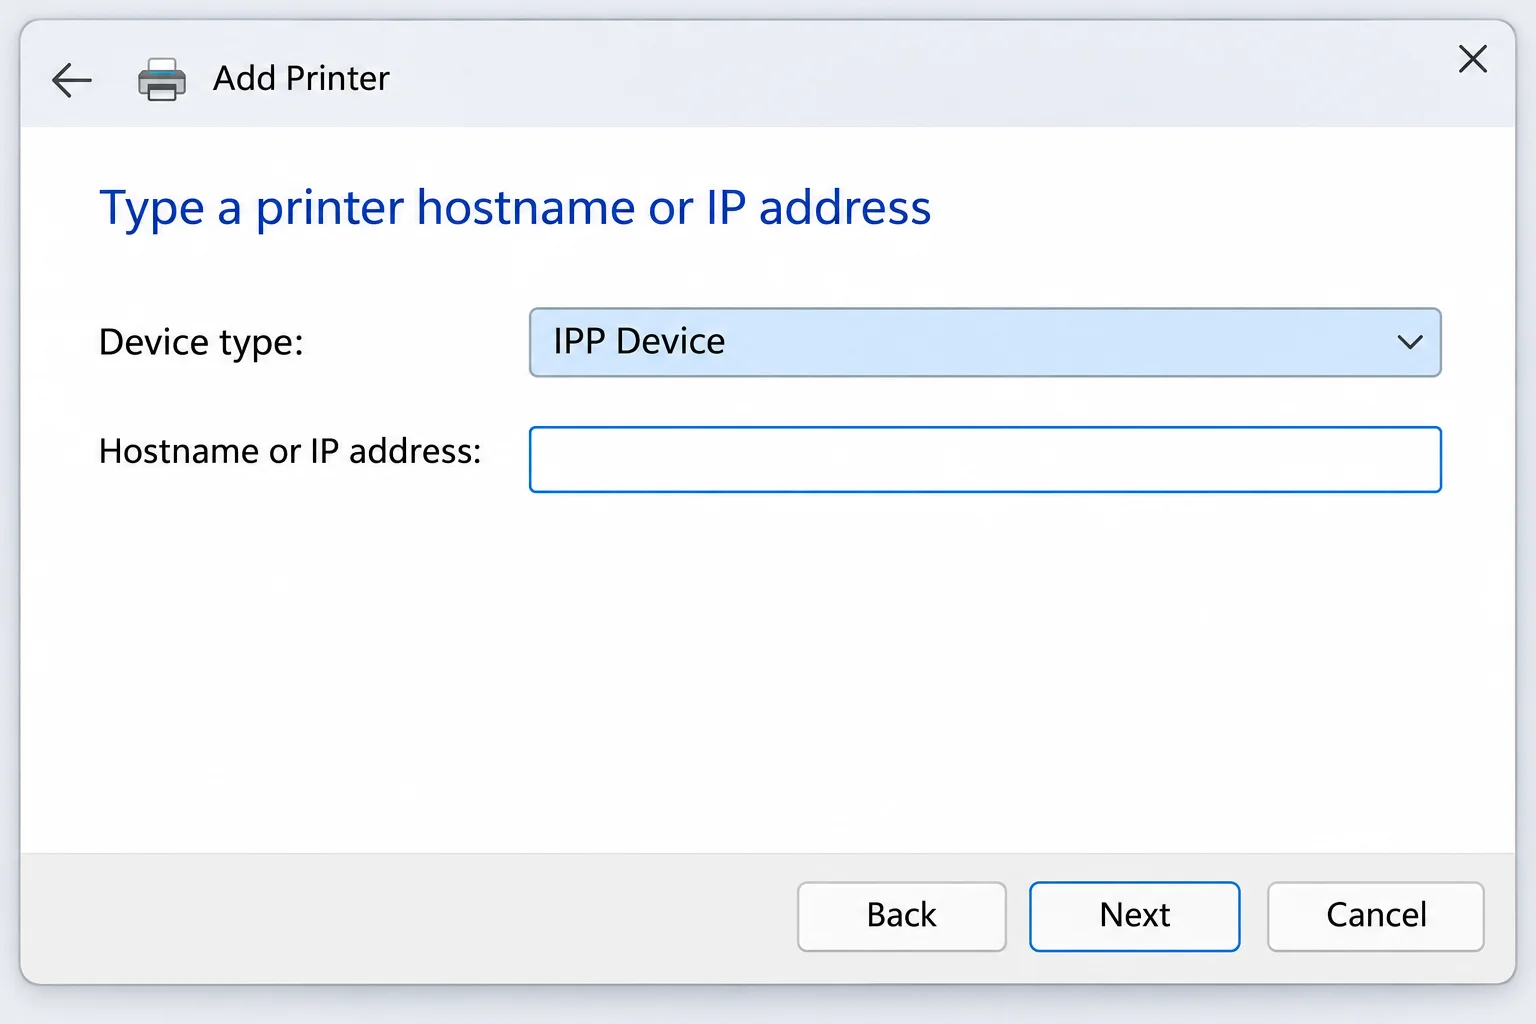
- Option A: Microsoft IPP Class Driver (Network Printers): Reconnect your network printer, find its IP address, and use Windows Settings to add a device manually via IP address or hostname. Windows will utilize its built-in IPP Class Driver for Mopria-certified network devices.
- Option B: Fresh Manufacturer Package (USB & Feature-Heavy Printers): Go to your hardware manufacturer’s official support website, download the latest Windows 11 driver package for your architecture, and run the installer while connecting your printer via a reliable USB cable or wired network connection.
Troubleshooting Common Removal Roadblocks
If you encounter unexpected errors during your cleanup process, consult these common solutions: