
Is your Windows 11 clock or time zone wrong, even though the “Set time automatically” toggle is turned on? Automatic timekeeping relies on a working internet connection, the background Windows Time service, and a reachable time server, while your motherboard’s clock battery keeps track of time while your PC is powered off. When these components fall out of sync, your system clock can drift or display completely incorrect information.
This troubleshooting guide walks you through everything from basic Settings adjustments and background service configurations to command-line tools, dual-boot registry tweaks, and hardware battery replacements.
Understanding Why Windows 11 Clocks Go Wrong
Automatic time synchronization depends on several underlying components working together seamlessly. Understanding how your system keeps time helps identify where a failure might be occurring.
The core prerequisites for automatic time sync include:
- A currently supported version of Windows 11.
- An administrator account (required for advanced service and registry fixes).
- A working internet connection. If you are offline, fix your network connection first.
- The Windows Time (
w32time) background service, which checks your clock against an internet time server (defaulting totime.windows.com).
If you are using a work or school PC, domain-joined computers get their time from the organization’s domain hierarchy (NT5DS) rather than an open internet server. If your time settings are greyed out or keep reverting, you will need to contact your IT team for assistance.
Quick Settings Fixes: Forcing Sync and Correcting Time Zones
Before diving into complex command-line utilities or hardware checks, start with the built-in Windows 11 Settings app to address immediate synchronization and zone errors.
1. Force an Immediate Time Sync
The “Sync now” button forces Windows to check in with the time server immediately instead of waiting for the next scheduled sync interval.
- Open Start > Settings > Time & language > Date & time.
- Ensure that Set time automatically is turned on. If it is already enabled, toggle it off and back on.
- Scroll down to Additional settings and click Sync now.
- Review the text beneath the button, which should display a recent “last successful time synchronization” timestamp and the server name.
If the sync fails, the background service is likely inactive or your network is blocking the server.
2. Correct Wrong Time Zone Offsets
If your minutes are accurate but the hour is completely off, your hardware clock is functioning fine; Windows is simply displaying it for the wrong geographical zone.
- Navigate to Settings > Time & language > Date & time.
- Turn off Set time zone automatically (as automated location detection can occasionally select the wrong zone, particularly when connected to a VPN).
- Open the Time zone drop-down menu and manually select your correct region (for example,
(UTC-05:00) Eastern Time (US & Canada)). - Ensure Adjust for daylight saving time automatically remains active if your region observes it.
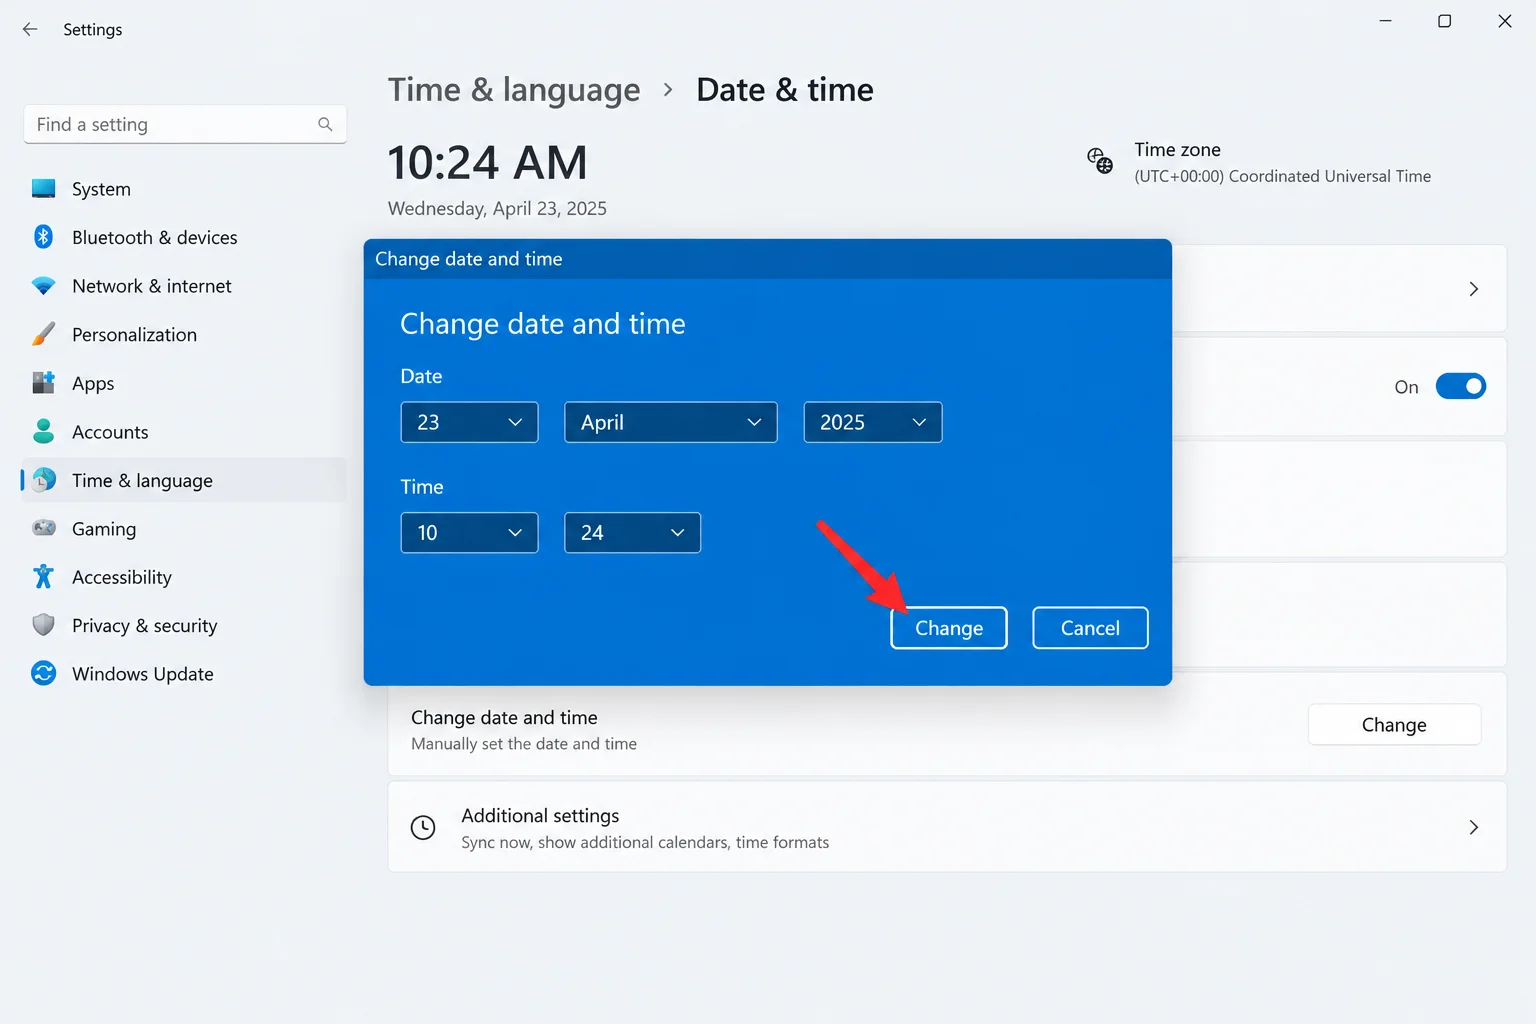
3. Set a Manual Date and Time
If automatic sync fails entirely and you need the correct time immediately (such as to clear certificate errors in your web browser), you can configure a manual stopgap:
- Go to Settings > Time & language > Date & time and turn off Set time automatically.
- Next to Set the date and time manually, click Change.
- Enter the correct date and time in the dialog box.
Keep in mind that a manual clock will drift over time. Treat this as a temporary fix and re-enable automatic time once you resolve the underlying sync issue.
Advanced Software Fixes: Services, Servers, and Command Line
When basic Settings toggles do not resolve the problem, you must investigate the background services, network routing, and system registration tools.
4. Configure the Windows Time Service
When automatic time is enabled but the clock remains wrong, the Windows Time service is frequently inactive or misconfigured.
- Press Win + R, type
services.msc, and press Enter. - Scroll down and double-click on Windows Time.
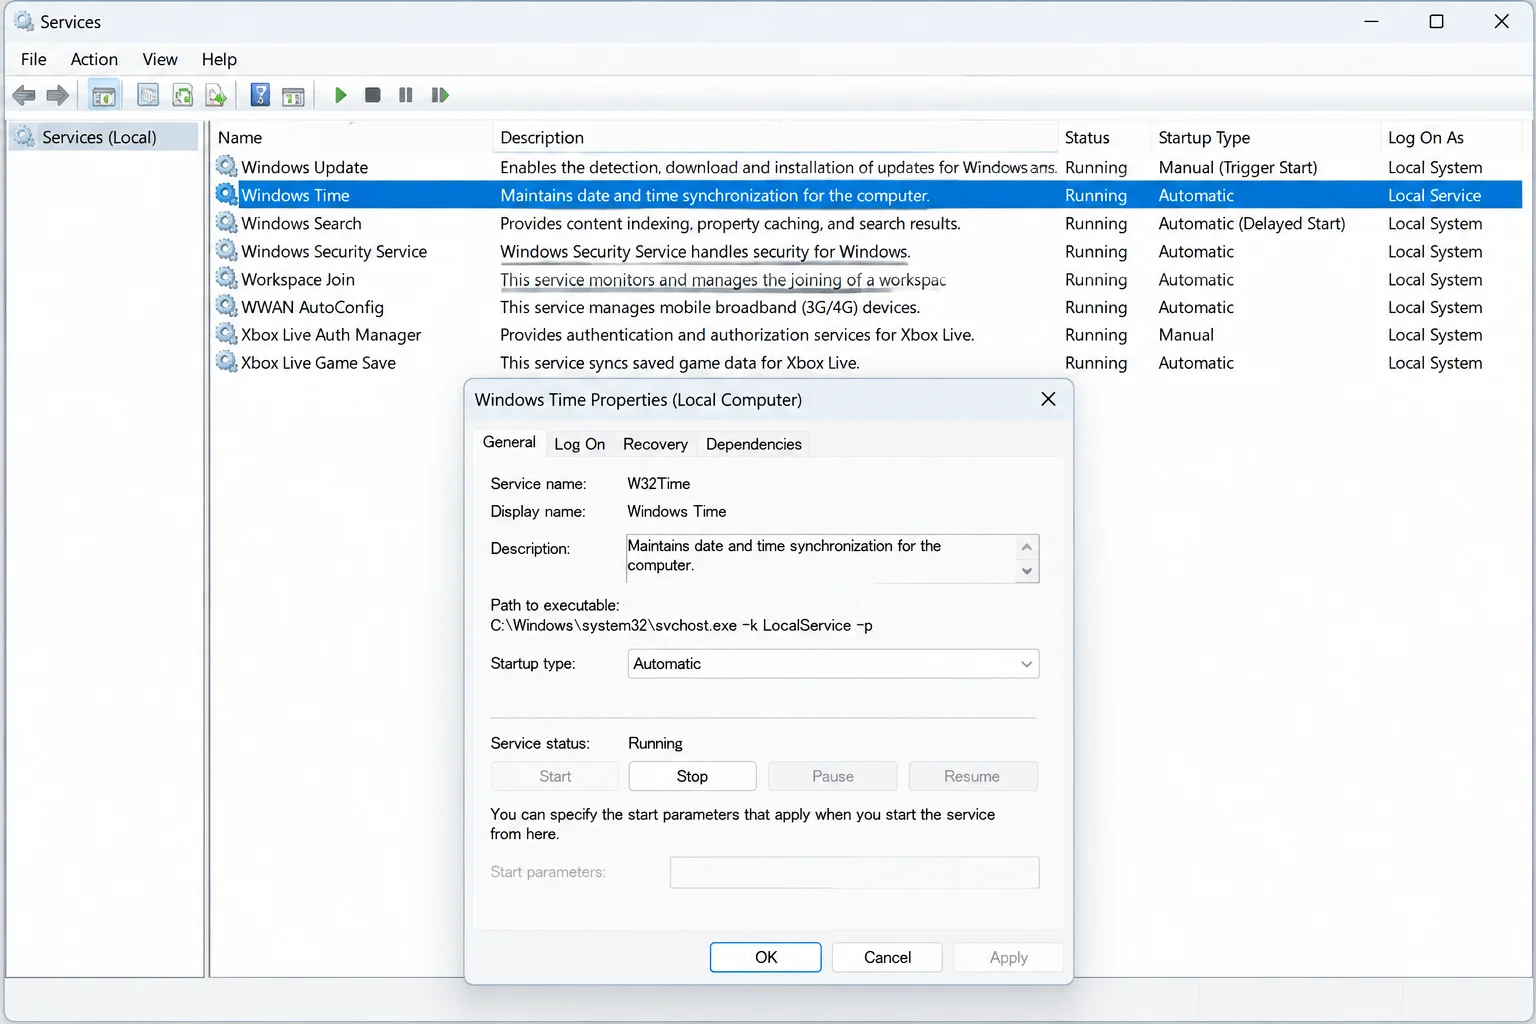
- Set the Startup type to Automatic to ensure reliable synchronization.
- Under Service status, click Stop, and then click Start (if it was already stopped, simply click Start).
- Return to Settings > Time & language > Date & time and click Sync now.
5. Switch to an Alternative Time Server
Strict routers, corporate networks, and VPNs often block default servers like time.windows.com. Pointing Windows toward an alternative public time server can restore synchronization.
- Press Win + R, type
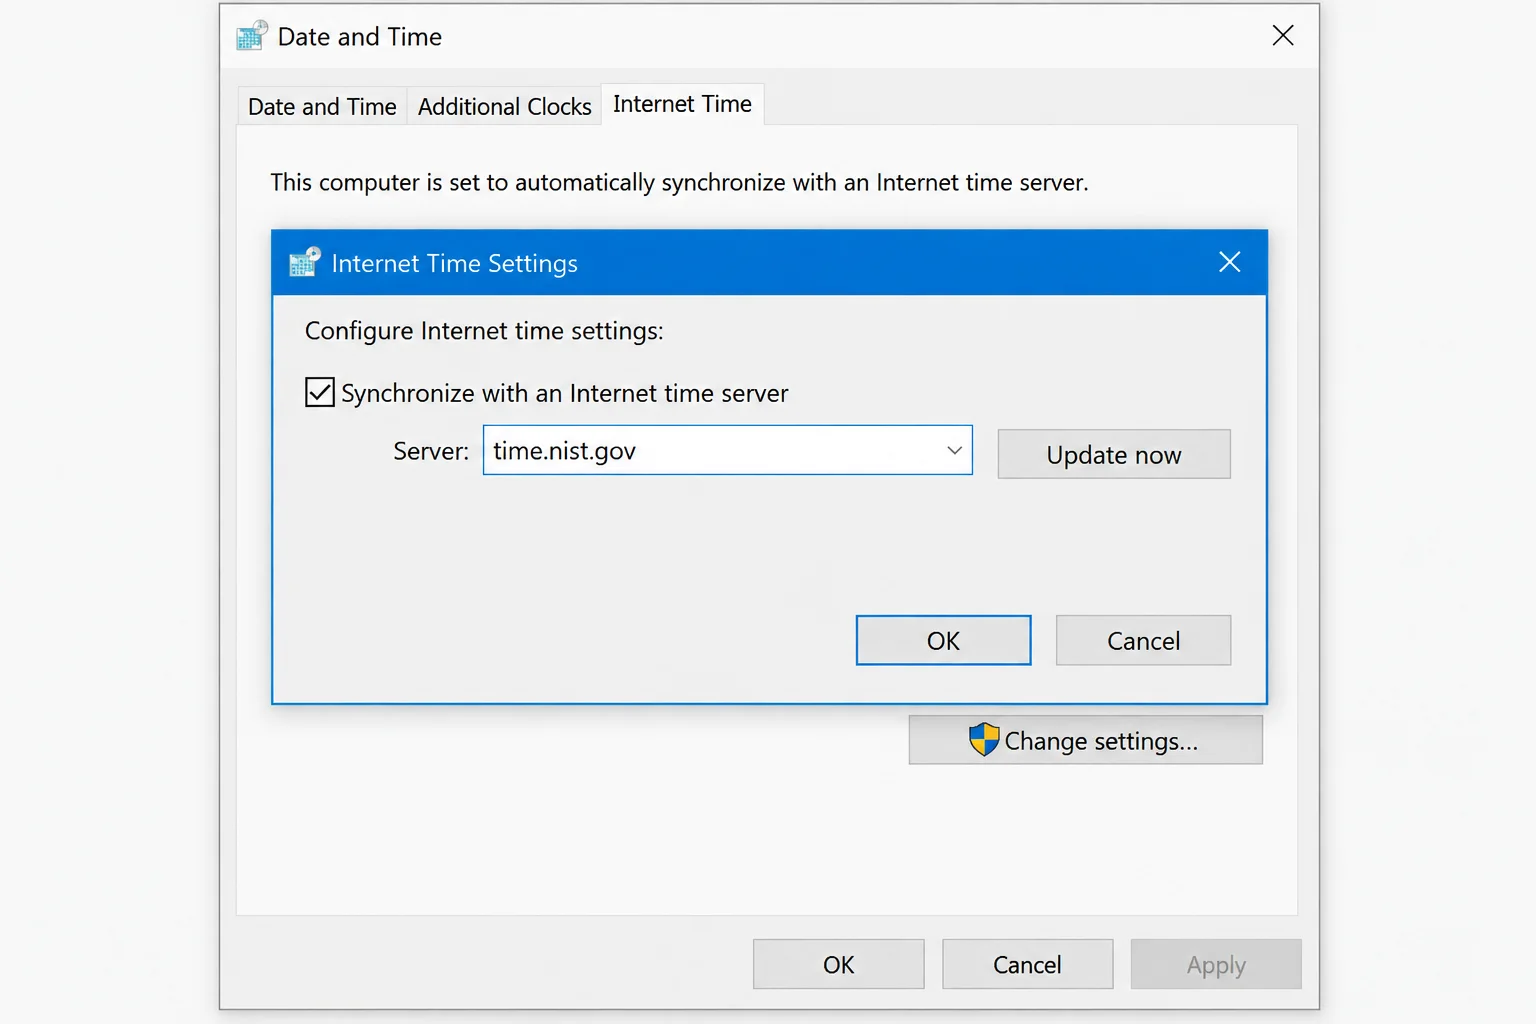
timedate.cpl, and press Enter. - Navigate to the Internet Time tab and click Change settings.
- Ensure Synchronize with an Internet time server is checked.
- In the Server field, input an alternative server such as
time.nist.gov. - Click Update now. A success message confirms that synchronization is operational.
6. Use Command Prompt to Resync
The w32tm command-line utility interacts directly with the Windows Time service to force discovery and synchronization.
- Open the Start menu, search for Command Prompt, right-click it, and choose Run as administrator.
- To force an immediate synchronization check, type
w32tm /resyncand press Enter. - To check the status of your time source, type
w32tm /monitorand press Enter.
Interpreting the command outputs helps guide your next steps:
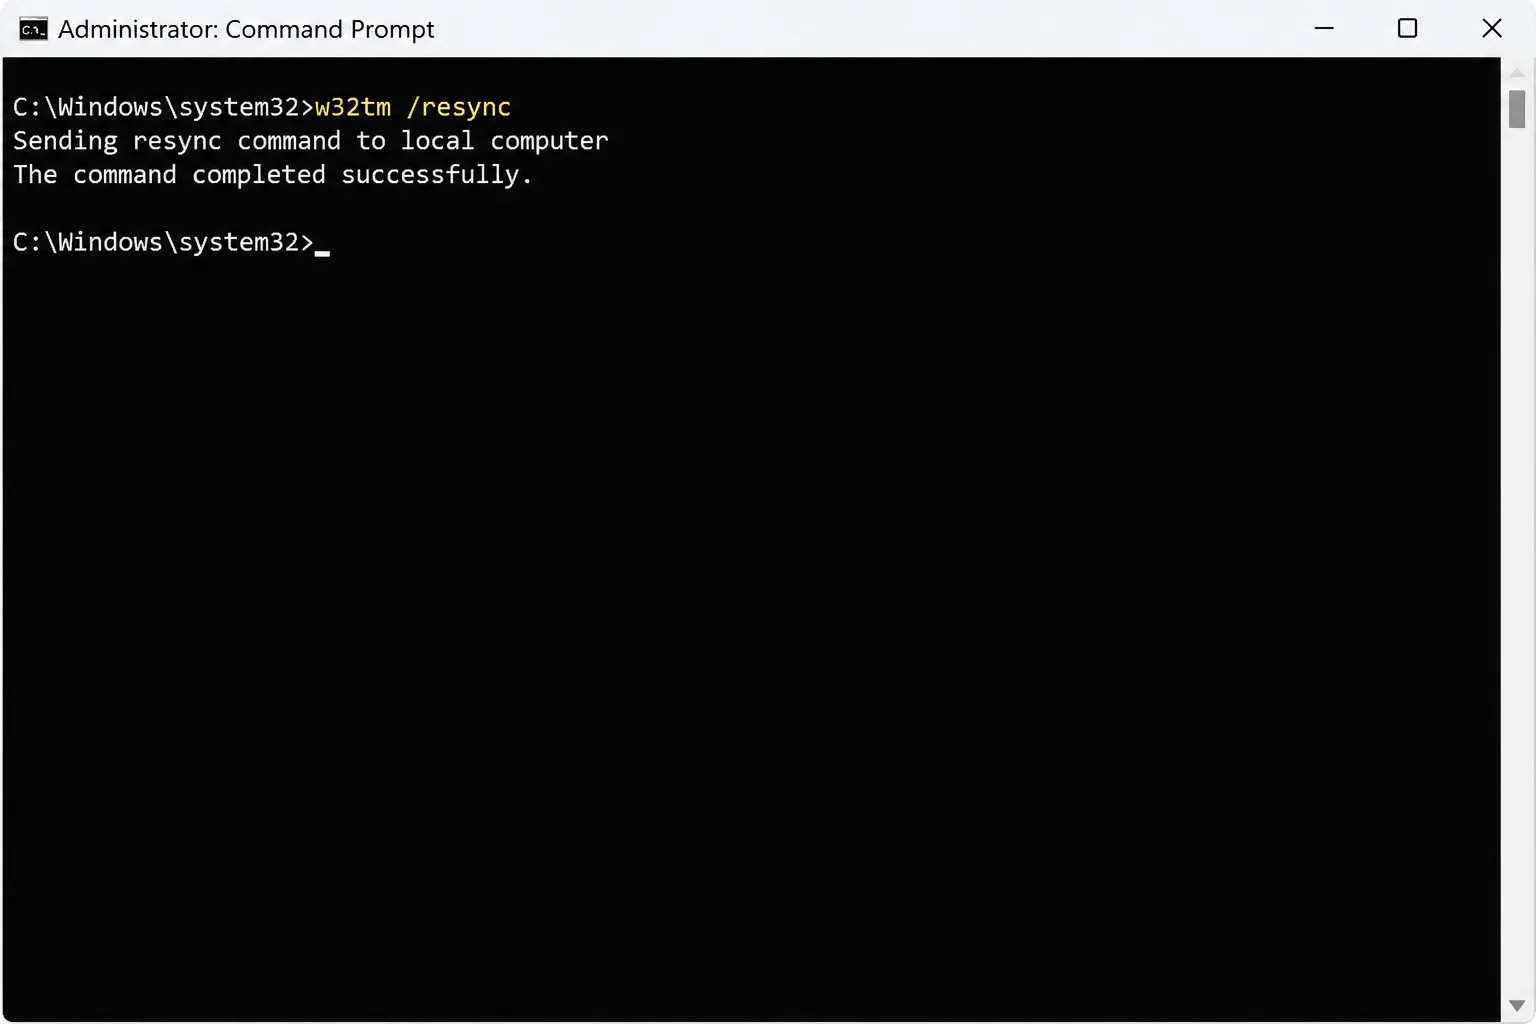
- “The command completed successfully.” indicates that synchronization is complete.
- “The service has not been started.” means you must return to Fix #4 and start the Windows Time service.
- “The computer did not resync because no time data was available.” indicates Windows could not reach a server, requiring you to try an alternative server or check your network.
7. Re-register the Windows Time Service
If the service continues to malfunction after a restart, its underlying system registration may be corrupted. This process resets configuration files to default settings.
- Open an administrator Command Prompt.
- Stop the service by typing
net stop w32timeand pressing Enter. - Unregister the service using
w32tm /unregister. - Re-register the service using
w32tm /register. - Restart the service with
net start w32time. - Optionally, point the service to a specific server and resync using
w32tm /config /manualpeerlist:time.windows.com /syncfromflags:manual /updatefollowed byw32tm /resync.
Specialized Fixes: Dual-Boot Time Jumps and Hardware Battery Failure
Some time discrepancies stem from operating system conflicts or failing physical components rather than standard software configurations.
Fixing Dual-Boot Time Jumps (Windows and Linux)
If your system clock jumps by several hours every time you switch between Windows and Linux, the two operating systems disagree on how to interpret the hardware clock (local time versus UTC). To make Windows treat the hardware clock as UTC:
- Back up your registry first by pressing Win + R, typing
regedit, clicking File > Export, setting Export range to All, and saving the backup file safely. - Navigate to
HKEY_LOCAL_MACHINESYSTEMCurrentControlSetControlTimeZoneInformation. - Right-click in the right-hand pane, choose New > DWORD (32-bit) Value, and name it
RealTimeIsUniversal. - Double-click the new value and set its data to
1.
Replacing a Failing Motherboard CMOS Battery
A coin-cell battery on your motherboard powers the hardware clock while the PC is turned off. When this battery weakens, the PC loses track of time while unplugged.
Common signs of a failing CMOS battery include:
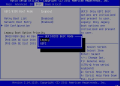
To diagnose and fix this hardware issue, shut down and unplug your PC for a few minutes, boot into your BIOS/UEFI setup utility, and check the system clock. If the time has reset inside the BIOS, replace the physical battery (typically a CR2032 coin-cell on desktops, or a specialized battery on laptops). Once replaced, set the correct time in BIOS, boot into Windows, and run an immediate sync.