
Whether you need to create a tutorial, capture an online meeting, save gameplay footage, or document a software issue, screen recording has become a useful skill for everyday computer users. Learning how to record screen on windows can help you share information more clearly than screenshots alone, especially when demonstrating a process step by step.
The good news is that both Windows 10 and Windows 11 offer built-in tools that make screen capture easier than many people realize. For users who need more control over video quality, audio sources, and recording settings, third-party solutions are also available.
Quick Answer: How to Record Screen on Windows?
If you’re wondering how to record screen on windows, there are three popular options available:
- Use Xbox Game Bar for fast recordings without installing additional software.
- Use Snipping Tool to capture a selected area of your screen in Windows 11.
- Use OBS Studio when you need advanced recording controls and higher-quality output.
The built-in windows screen recorder options are sufficient for many everyday tasks, while OBS Studio offers greater flexibility for content creators, educators, and gamers who require more customization.
Before You Start Recording Your Screen
Your Windows version, audio requirements, and recording purpose can affect which method works best and what features will be available. Consider the following points before getting started.
Check Your Windows Version
Before choosing a recording method, verify whether you’re using Windows 10 or Windows 11. Xbox Game Bar is available on both operating systems, making it one of the easiest ways to record screen on windows without downloading additional applications.
Snipping Tool screen recording, however, is primarily designed for Windows 11. If you’re using an older Windows 10 installation, some features discussed later may not be available.
Decide Whether You Need Audio
Not every recording requires sound. Some users only need visual footage, while others need narration, system sounds, or both.
If your goal is to create tutorials, product demonstrations, or presentations, you’ll likely want to record screen with audio. Consider whether you need microphone commentary, desktop audio, or a combination of both before selecting a tool.
Different applications handle screen recording with audio differently, so knowing your requirements in advance can save time later.
Choose the Right Recording Method
The best tool depends on what you’re trying to accomplish.
For quick captures, built-in Windows tools are often enough. If you’re creating training materials, educational content, or detailed walkthroughs, a more advanced solution may be worth considering.
Gamers often prioritize performance and video quality. Professionals creating client presentations may prefer simplicity and speed.
Which Screen Recording Windows Method Should You Choose?
The table below can help you decide which recording solution fits your needs.
| If You Want To | Recommended Tool |
|---|---|
| Record quickly | Xbox Game Bar |
| Avoid installing software | Xbox Game Bar |
| Record part of the screen | Snipping Tool |
| Create tutorials | OBS Studio |
| Record gameplay | OBS Studio |
| Customize recording quality | OBS Studio |
| Record professional videos | OBS Studio |
Xbox Game Bar is ideal for users who want a simple way to record screen on windows with minimal setup. Since it’s already included with Windows, you can start recording within seconds.
Snipping Tool works well when you only need to capture a specific section of the display rather than the entire screen. This can be useful for demonstrations and short instructional clips.
OBS Studio is the strongest choice for advanced users. It offers extensive recording controls, multiple capture sources, and professional-level customization options. If you’re planning to record screen on windows regularly for content creation, OBS is often the most capable solution.
Why Screen Recording Is More Popular Than Ever
Screen recording is no longer limited to gamers and video creators. It has become a practical tool for employees, students, educators, support teams, and business owners.
According to Fortune Business Insights, the global screen recording software market was worth $2.49 billion in 2025 and is expected to grow significantly over the next decade, reflecting the increasing demand for screen recording tools in education, remote work, gaming, and content creation.
The rise of remote work has increased the need to record screen on windows for training sessions, software demonstrations, and internal communication. Instead of writing lengthy instructions, teams can share short videos that show exactly what needs to be done.
Online learning has also contributed to this trend. Teachers and trainers frequently use screen recording software to explain concepts, demonstrate workflows, and create reusable lessons.
Content creators rely on free screen recording software and premium solutions alike to produce tutorials, reviews, and walkthroughs. At the same time, technical support teams often use a software screen recorder to document bugs and provide troubleshooting guidance.
As video communication continues to grow, more users are looking for reliable ways to record screen on windows efficiently, whether for work, education, or personal projects.
How to Record Screen on Windows with Built-In Tools
One of the easiest ways to record on-screen activity is by using tools already included with Windows. These built-in options require no installation, are easy to access, and work well for most everyday tasks.
If you want to record screen on windows without downloading additional software, the following methods are a great place to start.
Record Screen on Windows Using Xbox Game Bar

Xbox Game Bar is a built-in recording feature available on both Windows 10 and Windows 11. Although it was originally designed for gamers, it has become a practical solution for anyone who wants to record screen on windows quickly. Whether you’re capturing a software tutorial, saving an online presentation, or documenting a technical issue, it can handle many common recording tasks with minimal setup.
One of the biggest advantages of Xbox Game Bar is convenience. Since it comes preinstalled, there’s no need to search for a separate application or configure complicated settings. It also supports microphone input and system audio, making it useful for creating narrated recordings.
For users looking for a screen recorder windows 10 solution, Xbox Game Bar remains one of the easiest options available. The same applies to those searching for a reliable screen recorder windows 11 tool, as Microsoft continues to include and improve the feature in newer Windows releases.
That said, Xbox Game Bar is not designed for every scenario. It works best when recording a single application window or game. Users who need advanced controls, multiple recording sources, or professional production features may eventually outgrow its capabilities.
Steps to Record Screen on Windows with Xbox Game Bar
Follow these steps to start recording:
- Open the app or window you want to record.
- Press Windows + G to open Xbox Game Bar.
- Open the Capture widget if it is not already visible.
- Click Start Recording.
- Enable the microphone if you want voice narration.
- Perform the actions you want to capture.
- Click Stop Recording when finished.
- Open the saved video from the Videos > Captures folder.
For most users, this is the fastest way to record screen on windows without installing additional tools.
What Xbox Game Bar Cannot Record
Before relying on Xbox Game Bar for every project, it’s important to understand its limitations.
The feature is primarily designed to capture active applications rather than the Windows desktop itself. In many cases, it cannot record the desktop environment before an application is selected.
Another limitation involves File Explorer. If you’re planning to demonstrate file management tasks, you may notice that some recording attempts do not behave as expected.
Multi-window workflows can also be challenging. Since Xbox Game Bar focuses on the currently active application, switching frequently between programs may not produce the results you want. For more complex recording scenarios, a dedicated tool may be a better choice.
Record Screen on Windows Using Snipping Tool
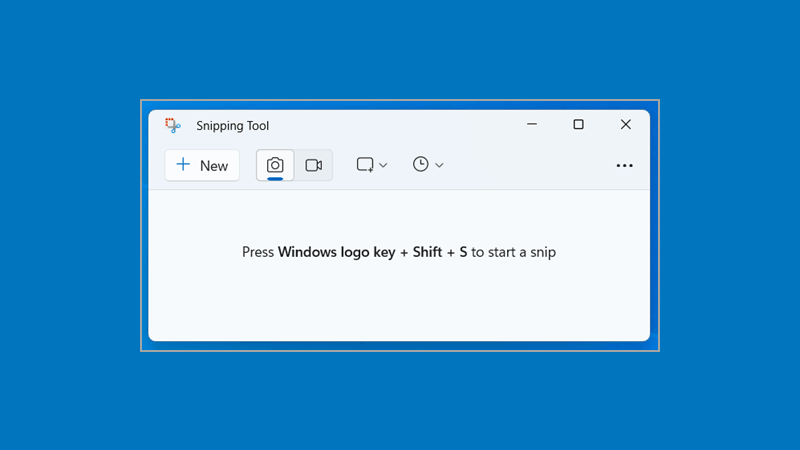
Many Windows 11 users know Snipping Tool as a screenshot utility, but Microsoft has expanded its functionality by adding video capture capabilities. The introduction of snipping tool screen recording provides another built-in option for users who need simple video recordings without installing third-party software.
Unlike Xbox Game Bar, which focuses on recording an application, Snipping Tool allows you to select a specific area of the screen before recording begins. This makes it useful when you only want to capture part of the display instead of everything visible on your monitor.
For users researching screen recording windows 11 features, Snipping Tool is one of the most convenient additions introduced in recent Windows updates. It provides a clean interface and requires very little configuration.
Another advantage is precision. Rather than capturing an entire application window, you can choose exactly what appears in the final video. This helps reduce distractions and creates cleaner recordings for demonstrations and instructional content.
There are some limitations, however. The feature is only available on supported versions of Windows 11, and it does not offer the advanced controls found in professional recording applications. Users who need extensive audio management or higher-end production tools may eventually require a more powerful solution.
Steps to Record Screen on Windows with Snipping Tool
To start recording with Snipping Tool:
- Open Snipping Tool from the Start menu.
- Select the Record option.
- Click New.
- Choose the area you want to capture.
- Click Start Recording.
- Perform the actions you want to record.
- Click Stop when finished.
- Save the video to your preferred location.
This method is especially useful when you want to record screen windows 11 activity without recording the entire display.
When Should You Use Snipping Tool?
Snipping Tool works best for short recordings that don’t require advanced editing or production features.
For example, it can be useful when creating quick tutorials for coworkers, demonstrating software features, or showing someone how to complete a specific task. Because you can select a custom recording area, it is also helpful for focused demonstrations where only part of the screen matters.
Users who occasionally need to record screen on windows may find that Snipping Tool provides everything they need. It is lightweight, easy to access, and well suited to simple recordings that can be captured and shared in just a few minutes.
If your requirements remain straightforward, both Snipping Tool and Xbox Game Bar offer practical ways to record screen on windows without installing additional software. For more advanced recording controls, however, a dedicated application may be the better option.
How to Record Screen on Windows with Third-Party Software
Built-in Windows tools work well for basic tasks, but they may not satisfy users who need higher-quality recordings, multiple audio sources, or advanced customization options. That’s where dedicated solutions come in.
A best screen record fo windows often provides greater flexibility, making it easier to create tutorials, presentations, gameplay videos, and professional content. If built-in options feel limiting, a dedicated screen recorder software can offer much more control over the recording process.
Record Screen on Windows Using OBS Studio

When people search for a powerful way to record screen on windows, one name appears more often than almost any other: OBS Studio.
OBS Studio, short for Open Broadcaster Software, is a free and open-source application designed for screen recording and live streaming. Unlike basic tools that focus on simplicity, OBS gives users detailed control over video quality, audio sources, capture methods, and output settings.
One reason OBS has remained popular for years is that it balances powerful features with zero licensing costs. Users can install the software, customize their setup, and create professional-quality recordings without purchasing a subscription.
The open-source nature of the project is another advantage. Developers around the world contribute improvements, bug fixes, and new features. As a result, OBS software continues to evolve while remaining free to use.
For content creators, trainers, educators, and gamers, OBS offers capabilities that built-in Windows tools simply cannot match. Users can capture multiple screens, switch between scenes, combine webcams with screen recordings, and adjust recording quality to suit different projects.
If your goal is to record screen on windows for YouTube tutorials, software demonstrations, training materials, or gameplay footage, OBS provides far more flexibility than Xbox Game Bar or Snipping Tool.
Why Many Users Choose OBS Studio
The popularity of OBS isn’t based solely on features.
According to the OBS Project, one OBS Studio release recorded more than 9 million downloads within a three-month period, highlighting the software’s popularity among streamers, educators, and content creators.
That level of adoption reflects how widely trusted the platform has become. Many professional creators rely on OBS Studio every day because it supports different workflows without forcing users into a specific setup.
Some people use it to create training videos. Others use it for gameplay recording, webinars, product demonstrations, online courses, or technical presentations.
Another benefit is flexibility. Users can capture a single application, an entire monitor, a webcam feed, or several sources simultaneously. This makes OBS one of the most versatile tools available when you need to record screen on windows beyond basic requirements.
Steps to Record Screen on Windows with OBS Studio
Follow these steps to start recording:
- Download OBS Studio from the official website.
- Install the software on your computer.
- Launch OBS Studio.
- Complete the Auto Configuration Wizard if prompted.
- In the Sources panel, click the plus (+) button.
- Select Display Capture.
- Choose the monitor you want to record.
- Configure desktop audio and microphone sources.
- Click Start Recording.
- Perform the actions you want to capture.
- Click Stop Recording when finished.
- Open the recordings folder to access the saved video.
After the initial setup, future recordings become much faster because your capture settings are already configured.
Display Capture vs Window Capture
One area that often confuses beginners is selecting the correct capture source.
| Capture Mode | Best For |
|---|---|
| Display Capture | Entire screen |
| Window Capture | One application |
| Game Capture | Games |
Display Capture records everything visible on a monitor. This is the best choice if you want to record screen on windows and capture all activity occurring on your display.
Window Capture focuses on a single application. It helps eliminate distractions and prevents unrelated windows from appearing in the recording.
Game Capture is optimized specifically for games and often provides better performance than other capture methods.
A common mistake is selecting Display Capture when only one application needs to be recorded. Another is choosing Window Capture and then wondering why other windows are not visible in the final video.
How to Record Screen on Windows with Audio
Many users don’t just want video—they also need sound. Whether you’re creating tutorials, recording meetings, or producing educational content, audio can make recordings more useful and easier to follow.
Recording System Audio
System audio includes sounds generated by Windows and running applications.
Xbox Game Bar can capture application audio automatically in many situations. OBS Studio offers even greater control, allowing users to adjust volume levels, separate audio tracks, and monitor sound sources while recording.
If you need to record desktop audio, OBS is usually the more flexible option.
Recording Microphone Audio
Voice narration is especially useful for tutorials and demonstrations.
Most recording tools allow users to record screen with microphone input, making it possible to explain actions while they happen on screen. This approach often creates a better viewing experience than silent recordings.
Recording Both at the Same Time
For the best results, test your microphone and system audio before starting a recording session. Balanced audio levels help prevent situations where background sounds overpower narration or vice versa.
Xbox Game Bar vs Snipping Tool vs OBS Studio
The right tool depends on your recording needs.
| Feature | Xbox Game Bar | Snipping Tool | OBS Studio |
|---|---|---|---|
| Free | Yes | Yes | Yes |
| Built-In | Yes | Yes | No |
| Windows 10 | Yes | No | Yes |
| Windows 11 | Yes | Yes | Yes |
| Audio Recording | Yes | Limited | Yes |
| Full Screen Recording | Yes | Selected Area | Yes |
| Advanced Controls | No | No | Yes |
| Best For | Quick Recording | Short Clips | Professional Recording |
Xbox Game Bar is ideal for quick recordings and casual use. Snipping Tool works well for short clips and focused demonstrations. OBS Studio is the strongest option for users who need advanced controls, multiple recording sources, and higher-quality output.
If you’re looking for the easiest way to record screen on windows, Xbox Game Bar is usually sufficient. If you need more customization, OBS remains the better long-term solution.
Where Are Screen Recordings Saved?
After you record screen on windows, knowing where the files are stored can save time and frustration.
Xbox Game Bar
Recordings created with Xbox Game Bar are typically saved in:
Videos > Captures
This default location makes it easy to find recently recorded files.
Snipping Tool
Snipping Tool allows you to choose where recordings are saved. After stopping a recording, select a folder before saving the file.
OBS Studio
OBS Studio stores recordings based on the output path configured in Settings. You can check or change this location at any time by opening the Output settings menu.
Whether you’re using a built-in windows recorder or a dedicated recording application, knowing the save location helps you manage files more efficiently and quickly access your finished video recording windows projects.
Common Screen Recording Problems and Fixes
Even when you follow the correct steps to record screen on windows, problems can still occur. Most issues are easy to fix once you identify the cause.
No Audio in the Recording
Missing audio is one of the most common recording issues.
First, check whether your microphone is muted or disconnected. If you’re using narration, verify that the correct input device is selected. You should also review Windows privacy settings to ensure recording apps have permission to access the microphone.
When you record screen on windows using OBS Studio, make sure the appropriate audio sources are added and showing activity in the Audio Mixer.
Black Screen or Missing Footage
A black screen usually indicates a capture source problem.
In OBS Studio, confirm that you’ve selected the correct source type. Display Capture records an entire monitor, while Window Capture only records a specific application. Choosing the wrong option can result in missing footage or unexpected output.
Graphics settings conflicts can also occasionally cause capture issues.
Recording Is Not Saved
If your recording disappears after completion, check the save location first.
Xbox Game Bar recordings are normally stored in the Videos > Captures folder. OBS Studio uses the output path configured in Settings. Insufficient storage space can also prevent files from being saved correctly after you record screen on windows.
Conclusion
Learning how to record screen on windows is easier than many people expect. For most users, the built-in tools included with Windows provide everything needed for quick recordings, basic tutorials, and simple demonstrations.
Xbox Game Bar is ideal when speed and convenience are priorities. Snipping Tool works well for capturing a specific area of the screen without unnecessary distractions. Both options are available without installing extra software.
For users who need higher-quality output, advanced audio controls, multiple capture sources, and greater flexibility, OBS Studio stands out as the stronger choice. Most Windows users can get started with built-in tools, but OBS remains the best option when professional-level recording features are required to record screen on windows effectively.
FAQs About How to Record Screen on Windows
Does Windows 10 have a built-in screen recorder?
Yes. Windows 10 includes Xbox Game Bar, which allows users to capture supported apps and games without installing additional software.
Is there a free screen recorder for Windows 11?
Yes. Windows 11 includes Xbox Game Bar and Snipping Tool. OBS Studio is another free option for users who need more advanced features.
Where to find screen recorder in PC?
You can access Xbox Game Bar by pressing Windows + G. Windows 11 users can also open Snipping Tool and use its recording feature.
Why is Win Alt R not working?
The shortcut may not work if Xbox Game Bar is disabled, unsupported apps are active, or recording permissions have been changed in Windows settings.
Where are screen recordings saved?
Xbox Game Bar saves recordings in Videos > Captures by default. OBS Studio and Snipping Tool allow recordings to be stored in user-selected locations.


